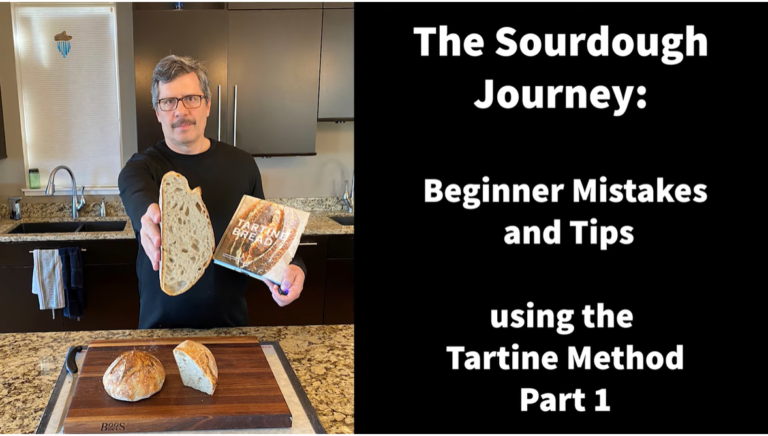
This is a verbatim transcript of the video: “Tartine Bread Step-by-Step: Beginner Mistakes and Tips” from The Sourdough Journey. Copyright 2020. All Rights Reserved
The video can be found at https://youtu.be/_YBCogA32k0
hi I’m Tom coming to you from Cleveland Ohio thank you for selecting this video today’s video is the sourdough journey
beginner mistakes and tips I made this video specifically for people who are
beginners at making sourdough bread there are all kinds of videos on the internet and they’re very good that
described the making of the sourdough bread process but many of these videos are brought to you by experts who have
done this for so many years that they’ve forgotten all the mistakes and all the questions that beginners have so the
purpose of this video is to talk through the entire process end to end of baking
sourdough bread and to really focus on what are the common mistakes that beginners make and what are many of the
questions that beginners have I’m a relatively new sourdough bread baker myself so I wanted to make this video
before I forget all the mistakes and questions that I had
so the first step in our process is to select a recipe that you want to follow sourdough bread baking is different than
other types of baking or cooking because the recipe is more than simply just putting the ingredients together each
one of these sourdough recipes is a process where based on the specific types of ingredients and the specific
quantities of the ingredients there’s a specific process that goes with that combination of ingredients that you have
to follow to make the recipe work and this is the first and most common
mistake that beginner sourdough bakers make is what I call recipe improvisation
recipe improvisation goes like this when I got interested in making bread sourdough bread I pulled out all of my
cookbooks – hip bread recipes I found the all-time best bread recipes how can
you go wrong with this I found the red revolution book buried in the back of my cabinet I read through
that and then I found the Tartine bread book and this is the one that I selected that will be going through today but
before I learned to use this recipe I did what I call recipe improvisation was
that rich as I read all three of these I printed out a dozen recipes off of the internet and when I made my first loaf
of bread I liked different parts of different recipes so I grabbed the first part of one recipe I grabbed the middle part of
another one and I grabbed the last part of the third one and I kind of put them all together and I thought that would work and I made a brick it just didn’t
work and what I realized very quickly is that these recipes are not genetic interchangeable parts you can’t take the
first half of one recipe and add it to the second recipe because as I mentioned earlier the recipe and the process are
inextricably linked so the idea of picking and choosing pieces of recipes
just doesn’t work so my first tip for beginning sourdough bread bakers is pick one recipe and stick to it exactly start
to finish until you master it and you’ll learn so much more than you will by changing all the variables and mixing
and matching pieces together then you will if you just pick one recipe and stick to it so that’s my first tip so
the recipe that we’ll be using through this process is from the Tartine bread book this is a fairly famous book by
Chad Robertson from the Tartine bakery in San Francisco and there’s a recipe in
this book called the basic country loaf which is one that many people follow and we’ll be following that recipe
throughout this process the Tartine bread basic country loaf there are plenty of other recipes out there on the
internet and and many of them are popular and proven if you choose to do it a different one just pick one of
those and follow it top to bottom start without exception that’s the best way to
learn
what I’d like to do each time I bake a loaf is I prepared a cheat sheet here
that I use and this just is a boiled down version of the steps in the book
and it has the key ingredients from the recipe and the quantities it has the key steps in the process and the times so
this reminds me of the steps that I need to follow and I also leave space on the sheet here to keep notes because it’s
very important to write down and what time you’re starting certain things what the temperature is and other things that
may go right or wrong along the way and then you can go back and learn from your notes so I highly recommend creating
some type of cheat sheet that you can follow
as I mentioned we’ll be following the Tartine bread method which includes the
basic country loaf recipe that’s the bread that we’ll be making this is basically a three day process so let me
give a quick overview of what we cover each day on the evening of day one we’ll do some preparatory materials and then
we’ll build the leaven the leaven then builds overnight through roughly a 12 to 14 hour process on the morning of Dave’s
who will essentially mix the dough that starts with the auto lease or ferment Elise process which takes roughly 40
minutes to an hour we then add salt and begin the bulk fermentation which is a three to four hour process including the
stretch and fold method which we will go through in detail after bulk fermentation is completed we will do a
rough shaping of the loaves with a bench rest which is roughly a 30 to 40 minute process then we’ll do final shaping of
the loaves for 10 to 15 minutes and then the low-vis go in the refrigerator for what we call an overnight full or
a cold proof which is roughly a 12 to 14 hour process on day three the morning of
day 3 we preheat the oven for about an hour we score and bake the lows that
takes roughly 45 minutes to an hour we let the lows cool for 90 minutes and
then we eat them that’s the step by step process that we’ll be covering throughout this video
you when you’re baking sourdough bread the
leaven is basically the vehicle that you’re using to take the yeast and the electric acid bacteria from your starter
and introduce that into your dough a lot of people ask the question what’s the difference between eleven and a starter
and there are really two things one is the the leaven is essentially a bulk top
version of your starter so many people maintain a fairly small quantity of starter I maintain about one hundred two
hundred and fifty grams of starter and for this 11 for this recipe we need 400
grams so we’re basically going to take the starter a small amount of starter add more flour and water give it a long
time to let that bulk up so it’s basically increasing the quantity of your starter and it’s also creating what
Chad Robertson calls is a younger version of the starter where it’s a little bit less acidic and a little bit
less sour which is the type of flavor that he goes for in this recipe not the classic really tangy sour dough flavor
but a little bit lighter flavor to his breath the second thing that the leaven
does that’s different than your starter is that some recipes call for different types of flour to be used in the leaven
than what you might use in your starter so for example somebody might you might use the starter that’s all purpose flour
100 percent all-purpose flour and the recipe might call for 11 which is half
all-purpose and half wheat flour or you might have a starter that where you use rye flour in it and then you might be
making a loaf that’s not a riot loaf so even though your starter includes rye
your leaven would not accurately include rye so that’s the difference between the starter and 11 one is just the quantity
bulking up the starter or the composition of the types of flour that are used in
and so we get ready to build our leaven there are three ingredients to the leaven we have our starter we have our
flour and we have water so let’s talk about each one of those three ingredients separately and then we’ll
come back and start the leaven building process
let’s talk a little bit about the starter I keep my starter in top of the refrigerator where it’s a few degrees
warmer than room temperature so let me grab my starter I keep a thermometer up there with my starter it was 77 degrees
Fahrenheit on top of my refrigerator that is 25 point one degrees Celsius
I just fed this starter about three or
four hours ago you can see the blue rubber band was where I started and it’s more than doubled in size so this is the
perfect time to be taking the starter to make the leaven you want your started really at its peak if I open up the
starter I always smell it it smells yeasty bread II it does not smell
vinegary does not smell acidic it does not smell like alcohol so this is really at its peak time where the the the
starter was actually domed up a little bit in the jar and it does not smell as
I said like alcohol yet it will over time so this is really the peak time you
want your start in this video I’m not talking about how we build the starter I’ll do a separate video on that topic
but this starter is basically the recipe that’s recommended in this art scene bread book it’s 50 grams of flour and 50
grams of water or attitude with the remaining starter everyday and the 50
grams of flour is a 50/50 mix of white bread flour and whole wheat flour which
is the same ratio that’s going into the leaven so our starter and our eleven in
this case have the same ratio of flour in them so you can think of this leaven
as essentially a bulk top version of the starter
we have our flower we’re using the king arthur unbleached
organic bread flour and we have King Arthur whole-wheat organic flour those
are the flowers that are two types of flowers that are recommended in the recipe when a recipe calls for white
flour you have two options typically you can use all-purpose white flour or bread
flour which is typically also known as white flour bread flour has a little bit higher protein content in it then
all-purpose flour and you’ll typically get a better gluten structure by using bread flour instead of all-purpose flour
you don’t want to substitute different flours than what’s called for in the recipe because that’s where you can
really get into trouble let’s talk about that in a little bit more detail
the second most common mistake beginners make is flour substitution what do I
mean by flour substitution so we get ready to bake a loaf we get a recipe this is what I did I want to make the
terpene bread I read the recipe it calls for 900 grams of white flour and 100
grams of wheat flour so what do I do I go dig around my pantry and see what
kind of flour I have and I have all this interesting flour so let’s see what we
have I have gluten-free flour maybe maybe that would work I have this
giant bag of semolina flour we really need to use this up so I may be able to use that I have spelt flour or spelt
flour is really good so that could be a great opportunity giant bag of rye flour or a look right
rib maybe I could make a ride low I have rice flour I have tipo zero zero this makes
fantastic Italian bread and pizza crust maybe I could make an Italian sourdough
low I have pasta flour I’m not making pasta but if I get in a jam this would probably work I have white hard wheat
flour this is expired and I have organic
I mean corn all-purpose flour this is einkorn is this ancient wheat from Europe if you made bread in Europe in
the Middle Ages you would use einkorn wheat so maybe if you’re a middle aged
bread maker you want to use the middle aged flour that could be good the bottom
line is that none of these will work none of these flowers are a substitute
for what’s called foreign recipe all of these have different protein contents they have different nibs or water
differently they have different leaving content so even though I have all this flour that I really want to use none of
this is interchangeable with basic white bread flour or whole wheat flour so if I
try to substitute any of these flowers they will more and you know if you’re not used to
baking bread you think flowers flower how different can it be these are all different and the recipes are very
specifically designed for the types of flower that are called for in the recipe so what should you do you should go to
the store and buy the flower that’s recommended so and the recipe calls for
white flour so we’ll be using this King Arthur unglued red flower as our white
flower and King Arthur a whole wheat flour for our 100 grams of whole wheat
flour this is one of the biggest and easiest problems to solve for beginners
has just used the flour that’s called for in the recipe because the recipes just don’t work these are not
interchangeable once you become an expert bread maker you can figure out how do i substitute rye or wheat how do
i substance you’ve spelt for white but but it’s incredibly difficult for a beginner to figure out how to do that
and it’s one of the most common reasons that beginners recipes will fail is
because they’re trying to interchange and use different flours that don’t they weren’t called for in the recipe the
second aspect of flour substitution is that you need to stick with the ratios that are called for in the recipe so
this one calls for 900 grams of white flour 100 grams of wheat flour and again
the beginners walk and say I really love wheat bread so maybe I’ll just do 90 %
wheat flour and 10% white flour I’ll make a wheat loaf the recipe will fail the ratios of the flowers are just as
important as the type of flowers so when you’re deciding what flour to use follow
exactly what is called fording the recipe
some people ask what type of water you should use and people you’ll get all kinds of answers when you ask people
that questions some people say the use tap water they use filtered water they use well one or they use distilled water
the the key thing that you need to know is that you don’t want chlorine in your
water if you’re adding it to your starter or it’s your dough so if you have a municipality that puts chlorine
or chloramine which is different type of chlorine into your water you want to filter that out before you add that to
your starter or your bread because for if there’s chlorine in your water and
you’re adding that to your starter and your dough in your starter you’re trying to grow a culture of bacteria and fungus
basically and if you have chlorine in your water it’s essentially like putting
bleach in your starter in your dough which kills 99.9% of household bacterias
so the main thing is whatever type of water you’re using just make sure you
get the chlorine out of it I have a filter on my refrigerator here so Ahriman Smith municipality puts chlorine
into our water the filter takes the chlorine out so now I have one chlorinated water you can use bottled water which is generally uncoordinated
different municipalities use two different types of chlorine which is important to know one is is chlorine
which can be boiled off and the other is something called chloramine which is chlorine and ammonia which does not boil
off some people think if you boil a municipal water out of the tap that you’ll boil off the chlorine but it does
not boil off chloramines so keep that in mind some people also Alaska if you should use distilled water distilled
water is okay but generally speaking people don’t recommend distilled water
because it’s also taken all the minerals and other good things out of the water if you’re using distilled water so you
want filtered tap water filtered well water bottled drinking water or
something like that just make sure that you’re not adding something to your dough or your starter that’s going to
kill the bacteria
sofe of 11 we have three ingredients we have the flour the starter in the water
and so let’s mix up the leaven recipe so
the ingredients for the leaven it calls for one tablespoon of starter and this
is the only measurement in the recipe where we’re not using the metric system or it’s not measured in grams everything
else from this point forward will be measured in grams but for some reason in the in the book it calls for a
tablespoon I think because it’s basically saying it Symphony precise measurement you can really all part how
much of the starter you want to put into the leaven but let’s pause for a moment and talk about why it’s important to
measure things in grams rather than using volume based metrics like cups and
tablespoons and things of that nature
the third most common mistake beginners make is inaccurate weights and measures when you’re baking breath so you’ll see
in any of the recipes many of the recipes are listed in grams rather than
cups and tablespoons and ounces so let’s pause and take a quiz this is like
jeopardy I’ll tell you the answer and then you guess the question the answer is 197 the question is how many
countries use the metric system another 97 the answer is 3 the question is how
many countries do not use the metric system maíam are Liberia and the United States
of America we don’t want to be like the three countries that don’t use the metric system when we’re baking bread
we’re going to be like the 197 countries that do and we’re going to weigh all of
our ingredients in grams and then you might say but why do I have to weigh them in grams I have cups and I can
convert cups to grams and that’s you know that’s that’s easier when you measure things by cup a cup a cup or a
tablespoon is a volume-based measure it’s not a weight based measure and when
you’re baking bread what you’ll find is that these recipes are incredibly precise in the ratio of flour to water
at different flours to each other or the salt the starter etc are very precise
measurements and they need to be measured by weight not by volume so when we’re used to baking a cake or whatever
and it calls for 4 cups of flour you’re really approximating the weight of that flour when you’re baking a cake
when we’re baking bread we really can’t approximate because different flours have different weights and different
salts have different weights so we need to measure everything by weight so let’s do a quick example of why we need to
weigh our ingredients in grams rather than measuring and cups or even trying
to convert from cups to grams using something like the internet or a conversion table so I’ve measured out
exactly cup of bread flour one cup of semolina flour and 1 cup of spelt flour and let’s
look at how much these weigh and how much the conversion table if we looked at converting these from grams to cups how close that would be to the actual
weight Alexa how much does one cup of flour weigh in grams 1 cup of flour
weighs about 120 grams 120 grams the actual weight is let’s subtract out the
weight of the cup 160 grams versus a
conversion of 120 if you use the conversion of 120 for your recipe and
you measured out this flour you would be over weighted with your flour by 34% that recipe would fail you would have a
dense front break let’s try semolina Alexa how much does one cup of semolina
flour weigh in grams 1 cup of enriched semolina flour weighs about 170 grams
170 grams is the conversion this cup of semolina flour is 124 grams if you use
that conversion factor the recipe would be underweighted and flour by 28% it
would be a soupy mess and that recipe would fail let’s try spelt flour Alexa how much
does one cup of spelt flour weigh in grams 1 cup of spelt flour weighs about
150 grams 150 grams this cup of spelt flour is 95 grams that weight is off by
37 percent if you use that conversion ratio and put that amount of flour into
your recipe it would fail this is the reason we need to weigh things the conversion is nothing wrong with Alexa
she’s really smart but those are average conversion factors an actual bag of
flour that’s in sitting on your counter has a different density different humidity different water content
different grams of flour weight different things you have to weigh your ingredients because these are massive what these are off by massive amounts we
ruin your recipe in three simple examples I have a dozen other types of flour here I could do this all day so we
need the way our our ingredients in grams
it’s the evening of day 1 we’re going to make the leaven at about 8 p.m. the
recipe book the Tartine book calls for the leaven to sit overnight there’s no
specific timeline in there at room temperature about 65° so we’ll make the
Lebanon about 8:30 my room temperature right now is 74 degrees Fahrenheit
twenty-three point five Celsius my thermostat will go down to 65 in about
an hour it’s winter here in Cleveland so our room temperature will get down to about 65 degrees and we’ll let that
leaven go until tomorrow morning sometime around probably 10 or 11 a.m.
there’s no specific time on the 11 building other than just saying overnight which I typically interpret it
as about 12 hours but there’s no specific items on that so the leaven
recipe calls for 1 tablespoon of starter
as I mentioned this is the last time we’ll use a non metric measurement so
I’m scooping out kind of one heaping tablespoon because this is really a Airy mixture in my starter here and I’m also
weighing this so we can see how much 1 tablespoon actually weighs trying to get
all of that out and that’s about 12
grams that’s pretty consistent with what I’ve seen in the past when I put 1 tablespoon of starter in is about 12
grams so let’s call it 12 grams of
starter and then before I put my starter away you can just look at what this
starter looks like it’s frothy it’s stringy like I said it smells like yeast
it has a tiny bit of alcohol smell to it but it’s really a frothy mixture in here
and if I turn my jar over it’s very
thick it is horrible it’s thicker than a batter it’s sticking
to the sides here I can almost hold this upside down without the starter coming out so you get a sense of of the
consistency of the starter you know we put our starter in a safe place so we have our starter 12 grams of starter
roughly approximately 1 tablespoon the next ingredient in the starter is 78
degree water so in the Tartine recipe there are very specific measurements
given for the water temperature and the dough temperature but let’s start with the water temperature in this case 78
degrees so what I usually do is heat up about 500 grams of water to about 80
degrees this is right at about it said about 8 degrees right now and the recipe
calls for 78 degrees so I’m gonna step over to my refrigerator and pour a little bit of cold filtered water in
here until I get it down to 78 okay the water is exactly 78 degrees what’s called is what’s called for in the
recipe so we’re going to add 200 grams
of water to the starter I always do this
on the scale so we’re always measuring even though this measuring cup has no
leaders on it I’m still measuring as I’m pouring you don’t want to overshoot and
we’re at exactly 200 grams of water that we added on top of the 12 grams of
starter just going to mix this in a little bit resolve it up
some people will ask what types of bowls should you use when you’re making sourdough glass bowls metal bowls
plastic bowls wooden bowls etc generally speaking you want to use glass or
stainless steel some people say don’t use metal bowls but stainless steel is a non reactive metal so it’s okay to use
stainless steel bowls for baking things like this if you use plastic bowls you
want to use the food safe bpa-free plastic I generally use a combination of
glass and stainless steel as you’ll see here over the next few steps of the
process so we’ve added two hundred grams of water now I’m going to zero that out and I add an equal amount of flour so
200 grams of water 200 grams of flour and it’s going to be a 50/50 mix of the white flour and a weak Brown actually
instead of adding this into the bowl what I like to do with the flour is pre combined it so that I mix the white and
wheat and I don’t get big clumps of white flour or wheat flour so let’s do that first and zero out this bowl I need
a hundred grams of my white flour before make me a knight hundred grams of the
wheat flour this is whole wheat flour organic 600 grams wheat flour then I
just like to combine these two together so you can see the white and the wheat was kind of separated it’s just based on
how I quartered and you don’t want to pour it into your water that we’re really big clumps of of white flour and
big lumps of wheat flour I’m actually going to make the leaven in the glass
whole now so I’m going to pour my star
[Music] embodied and want to mix this up
and this is the leaven so this is really the workhorse of your sourdough
everything you really need to make the bread is in here it’s the East and
lactic acid bacteria the other flour and water that we add later is going to get
eaten by the leaven we’re going here so
I’m just scraping down the sides of the bowl to make sure there’s no dry flour and just just kind of lightly mix this
together you can do with your hand you
just want to combine the ingredients but essentially what we’re doing here is like a super feeding of our starter so
we took 12 grams of starter and we added 200 grams of flour to that so typically
when you’re feeding your starter you’re doing a 1 to 1 to 1 ratio where you’re adding the same amount of water and
flour to your starter here we’re doing 200 grams of flour to 12 grams of
starter so that’s something like I don’t know 18 times feeding ratio so that’s
why this will sit then overnight because this has a little large food supply available and this is essentially what
will go into our dough tomorrow morning this will bulk up our starter it gives
the east and the lactic acid bacteria is something to eat overnight and they are going to be fully engorged on all this
fresh water and flour in the so I’m
going to cover this with a towel leave it on the countertop overnight room temperature will get down to 65
degrees which is what is called for and then we’ll see this growing size a little bit tomorrow in the recipe in the
book they suggest that you’ll see this grow about 20 to 30 percent in size it will spread out a little bit you’re not
going to see a huge growth in this like you would in your starter doubling for example this has a little bit different
pro 3 – and you’re just sealed a little bit of a size pumping up okay 11 is good to go
until tomorrow
so it’s day two of our sourdough journey it’s exactly been 12 hours since we made
the leaven last night let’s check it out and see where we are okay so the room
temperature last night was exactly 65 degrees it’s winter here in Cleveland temperature
went down to 65 so I’m just gonna test the dough temperature it’s the first thing I do and the leaven temperature is about
sixty six point three degrees so I can assume that it was around 65 degrees
last night my thermostat just kicked down this morning and maybe brought it up from degree there’s a little bit of a
dark crust on the top of this which is not uncommon it just dried out a little bit on top because they just put this
towel over it I could have put a plastic wrap or something over it which would
have kept that browning from doing that so now we’re going to size up the leaven
and see where we are the first thing that we want to do is smell it it still
smells pretty young and refresh and that’s smelling much of the acidic smell and all I’m smelling a yeasty flowery
smell so I’m going to just stir this up a little bit and see what’s happening
here you can see it’s starting to get strain just stirring in that that murder
crust that forms on the top it’s a little bit stringy but this one has a
little ways to go now how do I know that because I compare this to my starter so
here’s my starter now this has been going almost 20 hours since I last fed this yesterday but you can see that the
starter is very liquid very slightly much more liquid froth to it and we
don’t want the welding to become like the starter and it’s not expected to do that it should be in what what Chad
Robertson calls a younger stage because this is this is more acidic and alcohol
smelling so we want the leaven to be you know essentially what he would call a young 11
most but it’s a little ways to go I’m going to give this another hour or two everybody temperature now it might he
does back on this will come up and speed up the process a little bit while check this another
it’s been one hour since we checked our 11:00 and I just wanted to pause here
and describe how did I know that that the lemon wasn’t ready because this is
what’s frustrating about a lot of these how-to videos as you say well how am I supposed to know this this person is an expert they could immediately tell it
wasn’t ready I’m not an expert how am I supposed to know I knew because of what
the book told me so I go back to the recipe and it says the in the morning when you check your 11:00 and I’ll just
remind you that the the book and the process the recipe does not tell you how
long to let the lemon go it just says overnight so I approximated 12 hours so I know that the time could be a variable that
could go either direction but but in the book Chad Robertson gives you basically three tests to determine if your leaven
is ready the first one which I did first was the smell he said your lemon should
smell sweet and an overripe fruit sort of way I smelled the leaven it didn’t
smell like overripe fruit at all smelled like flour so I could tell that it just wasn’t quite active yet from the smell
so that was test number one test number two was just looking at it the book says
that it should increase in volume by about 20% and I could see that it had developed that that heard crust over the
top because it had gotten a little bit dehydrated in the night and it hadn’t risen at all from from when I put it in
this bowl last night and I did transfer this from a large glass bowl into a smaller glass bowl which was not on the
video last night but I could tell where it started and actually put a piece of tape on on this side which you can’t see
to determine what my starting point was end 11:00 had not risen by 20% so those
were two two tests that failed the third test that we could do which will do here momentarily is a float test where you
take a small spoonful of the leaven through it in water and see if it floats and that will give you an idea of
whether or not there’s enough co2 to aerated the dough and that indicates how much how active the yeast has been so
based on the failure over those first two three tests and not conducting the third test I determined to let this go
another hour and this is a great example of how this process works the ingredients in the
process the the water the flour and the starter are only a piece of the equation
and you also really have to be able to manage the temperature and the time because those are the only two variables
that we have available now because they can’t change the ingredients we measured all the ingredients exactly but we’re
running a biological process here and it’s going to run on its own time occasionally so you have to use these
other indicators to determine when it’s done and then you use time and temperature to influence it
so the fourth common mistake beginners make when they’re baking sourdough bread is failure to monitor the time and
temperature of the process when you think about sourdough bread baking some
people ask the question you know how complicated can it be there are only three ingredients flour water and salt
there are actually more than three ingredients there’s flour water salt and your starter your starter has to
microscopic ingredients in a yeast and the lactic acid bacteria so that’s up to
five ingredients now flour water salt yeast and lactic acid bacteria some up
to five but there are actually two other ingredients in sourdough time and temperature when you’re making
sourdough the recipe is not just the ingredients that you’re putting into it the process also includes accurate
measurement of the time and the temperature because of the fermentation that you’re
doing with the starter ingredients these are the invisible ingredients that you can’t really measure what’s happening
with the yeast and the lactic acid bacteria well you can measure the time
and temperature of your dough and the process and that’s how we approximate
what’s happening with these so there are actually seven ingredients in sourdough bread and that’s the way you have to
think of it flour water salt yeast lactic acid bacteria temperature and
time now why is this important I’ll show you one example when I was reading this
chip Robertson’s book about the Tartine method and he talks about his recipe
he gives specific temperatures water temperature internal dough temperature
and he gives one example here in the book where he says when he was baking bread and his bakery that if he reduced
the water temperature that he was adding to his his dough by one to two degrees
Fahrenheit it would lengthen the fermentation process with all fermentation process by
one and a half to two hours so just think about that so you’re trying to follow a recipe it says you’re bought
fermentation should be three to four hours I made the same mistake myself I’m measuring the clock I’m I have my timer
going I measure it out to four hours but what I wasn’t measuring was the dough temperature and he specifically says
that the internal dough temperature should be between 78 and 82 degrees the room temperature of my house was 72
degrees maybe my dough is roughly 72 degrees so my dough was under fermented because I wasn’t measuring the
temperature I was only measuring the time and then there are other examples where if the temperature is higher or
lower than the target you can adjust the time to compensate for that we’ll go through this in much more detail as we
go through the baking process but remember that you need to accurately measure time and temperature you need a
probe thermometer one of these you can buy at a kitchen store I have use ambient room thermometers these are two
dollars and fifty cents apiece on the internet you can use I keep one of these
with my starter at all times so I know what my starter temperature is you can keep one on your countertop so you know
your countertop temperature is I keep one inside my refrigerator when I do my overnight proofing so I don’t my
refrigerator temperature is it’s very important to know the temperature will show examples throughout the process of how we do that so based on the
importance of measuring the time and temperature I knew that this needed a little bit more time so now when we look at this compared to before I can see so
I’ll do the first thing is the visual tests and say did this increase in size by 20% I have some tape on the side of
the bowl here where the lemon was last night and by looking at it it’s up about
10% and you can also see from the dough that it’s that it basically has
shoulders around the edges this is a good way to see if your dough is rising in the bowl or your eleven is rising in
the bowl is that if you look around the edge all you can see that it’s doming up in the middle and that means that there is
air building up their co2 building up inside and is pushing the dough up from when we looked at or an hour ago you can
also see there are bubbles on the top we didn’t see any bubbles before so this is definitely ferment fermenting it’s very
active because you’re seeing the bubbles here so that means that the yeast is generating carbon dioxide so that’s a
good sign that our starter is working that we didn’t have a bad start or an immature starter so we’re getting some
co2 activity in the dough and then the third test that we can do is the flow test so I’ll take a cup of water room
temperature you take a small amount of the leaven and we put this into water to
see if it floats
and it does so the lemon passed the float test so what that means is that
the lactic acid bacteria and the yeast has fermented enough to generate enough
co2 to basically carry the weight of the flower in a cup of water so I passed the
float test I’ve increased in size by about 10% even though the the book says
it should increase by about 20 percent and then I do the smell test this does
smell a little bit like ripe cantaloupe so I’m starting to get that right fruity
smell the flowery smell that I smelled that I smelled an hour ago I could smell
the raw wheat flour is gone now so I’m definitely moving in the right direction but I still think this needs a little
bit more time so it passed one of the three tests we passed the float test it’s starting to get that right fruity
smell I can definitely smell that those notes in here and it’s increasing in
size you can see the bubbles I’m going to give us a little bit more time we’ll check in 30 minutes
you
you
so we have to decide what to do here this is a challenge but this is the reality of sourdough bread baking is
that you never really know how it’s going to work out so we’ll assess our options and decide what to do there’s
always a temptation at this point just to press forward and say oh it’ll be fine let’s move on ignore the the facts
of what we’re seeing here before us so I’ll consult the recipe and decide
where we go from here
you
okay we’re moving on to the next step which is mixing the dough so I consulted my eighth recipe and we basically need
our leaven water and flour for this step in the process then we’ll add the salt a
little bit later so I like to pre measure the ingredients so I already measured have 900 grams of bread flour
and 100 grams of whole wheat flour and it mix those together in this bowl I
have 1 liter a thousand grams of water in this picture which I’ve heated up to
80 degrees which is what the recipe calls for put that in the microwave and
that is exactly 80 point 2 degrees that’s very close we’re gonna go with
that I’ve also measured out with 20 grams of salt it’s very important to measure out
your salt in advance because sometimes you get caught up in the process and forget to add the salt that just happens
all the time I don’t know why but many people make that mistake of just kind of
moving on and forgetting about the salt so let’s briefly talk about the eleven
as it goes into the recipe so this is one of the most confusing parts of the
recipe in the Tartine bread book because the the method the Chad Robertson uses
to create the leaven is that you basically create 400 grams of leaven but you’re only using 200 grams of it in the
recipe and then he assumes that you’re taking the other 200 grams and using
that for your starter so you’re basically pitching your old starter that you created this with and are using this
fresh starter half of what’s left here the 200 grams career start for the next
batch so it’s just the way that he does that in this bakery but it’s very confusing because I have all the ingredients laid out here and a mistake
that a lot of beginners make is they add all of 11 to this recipe when in fact it only calls for half so be very careful
about reading the recipe and only including 200 grams of the leaven once you get into the process and if you’re
not actually using this method of keeping the extras hundred grams as your starter you can
just make 200 grams of leaven to begin with because I mean I’m gonna be discarding 200 grams of this I just did
it so that we could follow the recipe so that I wouldn’t skip this step of telling you not to cut that in half because it’s very important a lot of
people make that mistake but I don’t have the need for another 200 grams because I already have my starter going
in advance what you can do is you can drive this out and save it for a backup
starter and here’s one that I did a couple of days ago I took some XF starter that I can you spread it on
parchment paper and let it dry out for a couple of days and then you can put this
in a sealed jar and keep this as your backup starter you can rehydrate this
you know in the future some people say oh how long hydrated starter elapsed the
answer is a very long time there is evidence that they found there’s an
example where they found some dehydrated starter in Egypt and they believe it was
4500 years old they reactivated that rehydrated it and basically baked bread
with 4,500 year-old dried out starter so I started my last 4,500 years I don’t
know make sure you put the data in case somebody’s in the distant future so let’s start to mix up the ingredients
here so we’ll start with 11 and the water so again my purpose is ricotta
might you one more time is you only use half of the leaven that you just made we
made 400 grams the recipe calls for 200 grams to be added to the dough very very
common mistake people make is dumping the whole thing in and that will really ruin your loaf as I’m looking at this
leaven right now it actually looks pretty good so that longer time I believe worked I guess we’ll see in the
end of a dip but it’s a great example of why you have to be patient you can’t
really push forward and and just try to move ahead with the
process we took an extra two hours to get this in shape 193 grams and we get a
little bit more in here 206 this is always a tough hit this
exactly at 200 201 I’m gonna go with that this is my leftover leaven which I
can use as a starter I could create another batch of starter I could dehydrate this this actually looks pretty good so I’m happy with okay my I
think that’s gonna work okay then to the 200 grams of leaven we’re going to add
700 grams of water at 80 degrees and so
it heated this up in the microwave is exactly 80 degrees I’m going to pour this into the leaven I reset my scale to
zero I don’t want to overshoot the target you can pre-measure this if you’re not used to using the scale
because once you go over the target you can’t go backwards so I’m just
monitoring this as I’m pouring I’m up to
500 grams 600 I get to about 670 and I
slow down so I’m actually at 690 I tried to stop at 676 94 700 exactly so we
added 700 grams of 80 degree water to the leaven and now we’re going to just
stir this up to dissolve 11 into the
water again this is where all the magic happens the leaven is yeast lactic acid
bacteria this is what’s going to do all the work over the next couple of hours we are just coaching this stuff along
there’s not a lot that we’re doing here once we have this sentence that’s why the leaven is so important and hopefully
this batch will be a bit batch one of
the other potential problems with with the leaven not working is if you have a weak starter that happens sometimes
with new sourdough bakers as you’ll create a starter and it’s been going for
about a week and you decide that you want to pick some bread you get impatient so you try to make bread with
a fairly weak starter and that will cause 11 not to to rise properly I don’t
believe that was the case here because my 11 – starter is a couple of months old it’s very consistent it doubles in
volume every four hours in fact I have a video showing the the starter doubling
over to a four hour period that’s the actual starter that we used in this batch
so I’ve sufficiently dissolved the leaven there’s still a couple clumps in
here I’m just gonna reach in and break these up by hand really you really want to make sure that that’s dispersed you
don’t have clothes in there because the East can’t swim so you really want the
yeast and lactic acid bacteria as dispersed as possible in the dough
because if you get a big clump of them together they’re just gonna eat all the food around them and you really want as
much dispersion as possible so that’s pretty broken up now that looks pretty
good now we combine the flour so we have
a thousand grams of flour for the recipe 900 grams of white 100 grams of wheat and this will make two loaves so we’re
making a double batch here this is what’s called for in the standard recipe what I like to do is put in about half
of this stir it up to try to absorb some of the water so you don’t get giant clumps of
flour but that dissolve seeing a lot of
bubbles in here which is a really good sign a lot of activity in the leaven I think we’re gonna be good at a little
bit more stir that and you don’t want to
just dump all the flour in at one time because you just get a big ball of flour in the middle of your water
that’s becoming pretty shaggy I still have quite a bit of flour left so now I’m going to go to change my tools here
scrape off the spatula this is a tool
called a bowl scraper these are handy to have you can pick up a pack of four or five of those for $10 on the internet
they come in different sizes and different shapes it’s now I’m folding the flour into the water
this is really dry so you have to really work this quite a bit but it will absorb
there’s always a temptation here to think that I need to add water to this but you do not just keep keep working
keep working it and eventually the flour
will all be absorbed into the water if you measure things properly then this is a really what this call – shaggy loaf
our shaggy ball is the tell-tale sign
that you got the ingredients right if this is really soupy it means that you
added so much water or you didn’t add the right amount of flour you had a too little flour or you added the double bag
full of leaven this would be very soupy
when you see this shaggy ball you just
want to get all the wrong flour off the sides you don’t want to work this too
much you’re really just trying to hydrate the flour you didn’t feel it with your hands do is starting to get
sticky so let’s see that the water so I’ve absorbed all of the flour into this
shaggy ball it looks pretty good
so we’re just trying to make contact between all the flour and the water you
don’t want any dry patches of flour in
the dough so there is your shaggy ball that’s really what that’s supposed to
look like doesn’t look very pretty but that is what it’s supposed to look like a lot of dough out for hands also just a
note be careful when you’re watching the hands in the sink you don’t want to wash a lot of dough down your drain because
it’s like cement so kind of wipe your hands off on a rag or towel or something before or just getting as much of this
into the bowl as you can before you wash your hands in the sink cuz you want to keep as much of that dough as possible
out of your sink okay so this is now called the auto lease process which is
which is essentially adding the flour and water and letting it sit so that the water can start to release the enzymes
in the flour technically Auto releasing or the auto releasing is when you lease a car
instead of buying a car but the auto lease process is usually just flour and
water in this recipe that’s our team recipe we’ve also added this 11 to this
mix so this is actually technically a ferment Elise which is oddities plus the
fermented leaven but it’s accomplishing the same thing it’s just starting the
activity of water absorbing into the flour and starting the bulk fermentation
process because we’ve added the lemon as well so we’re gonna let this sit according to the recipe for 25 to 40
minutes and it’s about 10 10 a.m. so I’m gonna make a note of that in my cheat
sheet here we’ll be back in let’s say let’s say 30 minutes we’ll check this so
before we cover this I like to take the temperature just to see where we are we again at 80 degree water to probably
room temperature flower and this is a great temperature right now it’s a 79 point
four degrees that’s right in the sweet spot we want to cover that and make sure that it’s not draught no drafts or cooling it down keep it at room
temperature or my room temperature here my countertop is seventy-three point four degrees Fahrenheit twenty two point
nine Celsius so this is eventually going to to equalize with the room temperature
which is lower than our desired temperature between 78 and 82 when we
come back in 30 minutes we’ll talk about how we keep this temperature up in that desired range above 78 degrees
Fahrenheit
it’s been 30 minutes since we mixed our auto lease actually ferment Elise so
this is our starter water and flour let’s take a look at what we have here the recipe calls for letting this sit
for 25 to 40 minutes we’ve let it sit for 30 minutes I really can’t tell much
by looking at this dough relaxed a little bit which it should do what I will do is test the temperature because
it’s incredibly important from this point forward that we monitor our dough temperature at every step of the process
for the the leaven to really do its thing the dough temperature needs to be
between 78 and 82 degrees right now we are at seventy seven point nine seventy
seven point nine so we’re just on the low end of their range so at this point
it’s incredibly important to think about how you can manage time and temperature because other than the salt which is
going in next all the ingredients are in here there’s not a lot we can do with this other than manage time and
temperature so because this recipe gave me a range of 25 to 40 minutes I want to
take advantage of that time I’m not in a hurry I’m gonna let this go another 10 minutes so I’m gonna push the outside of
the range because my temperature is on the low end of where it needs to be at
78 degrees so on my temperature is low I want to add time when my temperature is high I want to take time away but
because I’m it’s right at 78 degrees and my ambient temperature in the room is 74
degrees Fahrenheit which is 23.4 Celsius what’s going to happen if I let the bowl
sit here is it will continue to approach room temperature of 74 degrees and then it falls out of the range of all
fermentation which needs to be between 78 and 82 Fahrenheit which is twenty
five point five and twenty seven point eight Celsius so that presents another challenge for us which is I need to find
some way to bring up the temperature of the dough so the way that we do that is
by creating what’s called a proofing chamber so let’s talk about actions proofing boxes or proofing chambers so
what we need to get it within the target range of 78 to 82 degrees for the fermentation to happen properly we need
to bring up the temperature of the dough we do that by creating a proofing chamber proofing chamber is basically an
enclosed space in your kitchen where you can get the temperature slightly above the room temperature usually about 10
degrees above room temperature or the target temperature that you’re trying to get to so that when you put your your
dough into that enclosed space it helps bring the temperature up of the target
range it’s basically a heated box for me what we’re going to use is the oven with the light on the heat turned off but the
light turned on and just the light bulb inside the oven will heat the oven somewhere between 85 and 90 degrees so
that works well for all the different options that I’ve looked at here I looked at doing in my microwave
sometimes people can put the dough inside your microwave with the door ajar which will turn the light bulb on in the
microwave my microwave doesn’t throw off enough heat to bring the temperature up and I know that because thermometers you
have to if you’re building a proving chamber in your kitchen or a proofing box you absolutely have to have one of
these thermometers with it so you know exactly what your temperature is sitting at I have a warming drawer here below my
counter where I tried this for proofing it actually has a setting I called proof but this is more for doing commercial
yeast based breads I put my thermometer in here it was 105 degrees on the lowest
setting I can get it to so if you have an oven with a proof setting if you have a toaster oven with a proof setting or
warming drawer the proof setting be careful that you measure what that temperature actually is because those
previous settings are usually much much higher than we need for sourdough so there are other ways you can improvise
to create a proofing chamber you can create you could put a cup of boiling
water this cup of boiling water and I could
put this inside my microwave with my Jo and my thermometer and that would bring the temperature up inside that closed
space you know something like this which is roughly a half a liter of boiling
water can bring temperature up between five to ten degrees in a fairly small enclosed space I could also take up this
small cup of a pitcher of boiling water I have two sinks I can put it in my sink but I could cover my sink and I’ve just
created proofing box by using my sink and a cup of boiling water so you have all kinds of options and if you want to
spend the money you can actually buy a proofing box they they make these things for Baker’s and it’s full plastic box
that pops up it has a thermostat on it you say your desired temperature you can just buy a proofing box and then you
don’t have to worry about improvising something first option is always just see what your oven temperature is with
the light on put a thermometer inside listen for an hour or so and if that you
know gets you into that range of 85 to negative 5 degrees that would work but
with all this talking I’m running out of time so I’m going to put this bowl into my oven for a few more minutes with the
light in my temperature inside that’s a
little hot but with the door opening and closing now it’ll go back down to around 84 85
our auto lease / / mental lease process has gone 40 minutes that’s the maximum
recommended time so the next step in the process is to add assault
you always pre-measure the salt and leave it
here in a very visible place you might want to put a big sign next to it that says don’t forget to add the salt for
some reason if you don’t have your salt sitting out you know you don’t make a note people get to the step and they
automatically start the next step and they forget to put the salt in it’s just like I meant a lot people have it happens all the time so I always put my
salt right in front of me to make sure that I don’t forget it so let’s talk about what kind of salt should we use a lot of beginners have a question about
what type of salt should I use in my sourdough recipe so like everybody else
when I started baking I dug around my pantry and what do I have I have good old Morton table salt
I have superfine table salt known as popcorn salt
I have coarse sea salt I have fine sea
salt this is actually ancient fine sea salt I think all salt is pretty ancient
I don’t know where you’re really getting young salt nowadays I have Himalayan salt this is the expensive stuff pink
Himalayan salt because it’s pink and it’s from the Himalayas and they have
kosher salt which I used for a lot of other cooking all of these salts will
work in a recipe what you want to do is consult the recipe and see if there’s recommendation in the Tartine bread
recipe Chad Robertson actually recommends that you use fine sea salt so that would be this one so that’s what we
would use so all these would work there’s not that much difference in in flavor
the main difference in the salts is the weight so we’re back to the issue of weighing our dry ingredients which is
important even with salt which is a fairly small quantity in the recipe this
recipe calls for 20 grams of salt so if I said I don’t need to weigh this in
grams I can just estimate off the internet Alexa how many grams of salt
err in 1 tablespoon there are 18 grams in 1 tablespoon of salt 18 grams and 1
tables soon I’m going to use a conversion factor so I have one tablespoon and I slightly round it that should give me 20
grams according to that conversion when you just kosher salt I’m going to do a rounded tablespoon
should be about 20 grams right there you probably don’t how this is gonna end
let’s pick this on the scale 15 grams
same story is with the flour you have to weigh your dry ingredients doesn’t matter which salt you pick you
just have to weigh it if I used this approximation of 18 grams and a
tablespoon of salt but I happen to pick kosher salt that would be underweighted in my salt in the recipe by 25% I had 15
grams from the recipe calls for 20 if I’m not weighing it I wouldn’t know that I would only find out later because it
would impact my fermentation rate and it wouldn’t impact my flavor so always way you’re driving your dry ingredients
including salt
okay moving on now we’re going to add the salt to the auto leaf so I’m going
to take that out for my proofing change now my internal temperature in the oven
is 85 degrees Fahrenheit that went down one degree because I have open to close the door so now we’re going to add the salt the
way that we add the salt my 20 grams here find sea salt the way that we have
the salt some people dissolve the salt in water first I find that it actually
spreads out better if you had it dry and then add water we’re going to add 50 grams of water I preheated this water in
my microwave to exactly 80 degrees you just want to test that again because it’s been sitting here on the counter
for a couple minutes it’s very important that you get these water temperatures
correct because that’s that’s what you have to impact the temperature of the dough and this is light it’s down to
seventy seven point eight degrees so it’s a little bit low it’s the only way I can impact the temperature is through
water or heat so I’m going to keep this up back up to eight okay I’ve got my water to eighty point three degrees you
can be slightly over you don’t want to be under the target the recipe calls for eighty eight degree water I need 50
grams to mix in with my salt and remember that here in a cup first rather
than try to pour it into the mix because it’s easy to overshoot on these small
quantities that’s exactly fifty so the way that we add the salt is I usually
take the dry salt I don’t put it in the water and you want to spread it around as much as possible so you don’t get big
lumps of salt in any one place so I’m spreading spreading spreading my salt
truly evenly and then I add this water same thing kind of pour this over the
top it’s gonna help us dissolve the salt into the mix and done we mix this by
hand typically so I’m gonna grab the dough and kind of
fold the salt in turning the bowl so
it’s pretty stiff very wet you know I never had that water but this is exactly how it typically feels turning squeezing
so even though you can’t see the salt in here you have to do this quite a bit
imagine you know to get all the salt evenly distributed throughout the dough
squeezing and turning do this little trick squeeze the dough down like this
this looks pretty good it gets that nice and kind of glassy look to it it’s mixed
in well make sure you get all the bits off the edges here couple more turns
here you’re not really intending to walk the dough here you’re really just trying
to get the water and the salt distributed that looks pretty
you so now that I’ve mixed in the salt we
are officially starting to bulk fermentation phase this phase according to the Tartine recipe takes three to
four hours and as I mentioned the target temperature for this phase is incredibly important 78 to 82 degrees Fahrenheit
25.5 to 27 play on the Celsius scale so we’re going to continually measure the
dough temperature to ensure that we’re within that range otherwise we need to add time so let’s see where we are right
now that mixing by hand cools the dough down a little bit because it’s exposing
it to room temperature so I’m at seventy six point two degrees so I’m below my
target range I’ve got to get the temperature up the only way I can do that now I don’t have any more ingredients to add I can add any more
hot water so I’m going to use my proofing chamber which is my oven with the light on which is sitting at about
85 degrees that’ll start to pull the dough temperature up if you’re right do that I want to move this into a
different container so a lot of times you’ll see sourdough Baker’s we’ll put
these on a tall square container when you do bulk fermentation so it’s a little easier to see if the dough is rising then in a bowl where it’s
basically spreading out and you can’t really tell if it’s rising just because of the kind of geometry of the bowl so
I’m gonna put this power container I’m gonna try to flatten that down so we can
see where the starting point is because
we will get a little rise during this process and we want to know how much rise we’re getting so I’m gonna mark
this with a piece of tape on my side and this is going to go into our proofing
chamber also known as the oven with the light on I am going to cover this with
this plastic bonnet you can buy these these are called plastic food covers
they work really well the reason I use the plastic now instead of my favorite towel there is because I want to see
what’s going on so I can see both when it’s in the when I take it out I can get it a little better picture of what’s happening here
so I want to put this into the proofing chamber and I’m going to put some tape on it off-camera
sorry I’m back put the tape on this and realized this actually doesn’t go back
into the proofing chamber yet we need to start our stretch and fold process there’s no resting time between adding
the salt and starting the stretch and fold I thought there was that there is not so we’re going to start the stretch
and fold process this is really the next major phase of the the dough making and
this is the most hands-on work that we need to do so we’re going to turn stretch and fold the dough at least four
times maybe five times with 30-minute breaks in between each one this is what’s recommended in the recipe I’m
going to do the first one so we can get this in the oven and then I’ll talk about why we’re doing it and and how to
do it so so basically with the stretch and fold process you want to reach down
to the bottom of the dough pull it up and let the gravity of the dough kind of stretch it you don’t want to rip it and
then you fold it over on itself turn it 90 degrees reach down at the bottom let
the gravity stretch and fold turn 90 degrees reach down at the bottom let the
gravity stretch and fold and the fourth
time so I’m turning 90 degrees each time stretch and fold that was a pretty rough
process the dough really hasn’t taken shape yet it’ll start to firm up and take some shape over time but we’re
really starting to just create some elasticity in the dough by doing that so now I cover this with our combined it
and we put this in the oven for 30 minutes with the light on you go set my
timer for 30 minutes this is where you have 30 minutes to kill this process really takes a lot of time there’s a lot
of waiting time in between the next two and a half hours this when you think about your sourdough time timeline this
is the time where you have to be kind of hanging around in these you know you have these 30 minute brakes that you need to adhere to 30
minute time slots for struction fold so think about something you can do in 30 minutes and I’ll see you back here in 30
minutes
okay it’s been 30 minutes and we are ready for stretch and fold number two
so I jut down the time they were doing this on my cheat sheet I looked at the
Ottoman temperature which is my proofing chamber I make a note of that eighty
five point four degrees is my oven temperature that’s about thirty degrees Celsius so now we’re going to take the
dough out and do stretch and fold number two okay so the first thing we want to
do always is see what our dough temperature is it’s the most important thing to monitor right now you want to
keep it between the target range of 78 to 82 degrees Fahrenheit which is twenty
five point five to twenty seven point eight Celsius so I’m measuring my dough temperature the center of my dough is
about 76 degrees so this is still low even though I’ve had it in the oven with
the light on where the ambient temperature and there’s 85 degrees the center of my dough is 76 so I make a
note of that so we are below our target temperature what this means is even at
this point I can already tell that our bulk fermentation time will need to be longer we need to push the envelope on
the recommended range of three or four hours we probably need to go closer to four hours because I’m not at the
desired temperature so this is the interplay between time and temperature we’re going to try to get this temperature up again in the oven with
the light on right by 85 degrees we’ll slowly bring the temperature up but we’re running a little bit behind or we
need to be right now need to get this temperature up a couple of degrees but in the meantime we need to do one more
stretch and fold this will be number two so stretching the fold number two before we do that let me just pause for a
moment and discuss why are we even doing this like what what is the stretch and
fold process all about so this is the equivalent when you’re doing traditional bread using commercial
yeast this would be the equivalent of the kneading process if you’ve ever made made traditional bread you need it you
need the dough Center you know press on a roll it do that for five seven eight minutes with sourdough because this is a
high hydration dough 75 77 percent hydration it’s too wet to knead it if
you try to knead this you would have more dough on your hands then you would have left in the ball so this method has
been devised called stretch and fold which basically does two things the stretching builds the gluten so it’s
essentially like rubber bands so I would take these rubber bands by stretching
the dough I’m orienting the gluten in this direction so I’m stretching it and
by stretching it on building muscles so it’s like when I go to the gym and you work out you’re stretching the muscle
and you’re building that elasticity and you’re building gluten that’s one of the key things that we need to get that
beautiful rise in our dough and to create the structure for the for the the
east to basically allow the dough to rise so our stretching and creating gluten that’s the stretching process
then the folding process by doing these 90 degree folds were stretching and
folding over then we turn 90 degrees stretch and fold over again so what
we’re doing if you can imagine is we’re creating a grid we’re creating a lattice of gluten I stretched this way I fold it
over I turn 90 degrees I stretch this way I fold it over so we’re creating this layer layering or lattice of these
gluten strings and we’re pulling the dough from the bottom we’re building it from the bottom pulling from the bottom
building from the bottom up from the top down basically and we’re building this lattice which is the structure that then
allows the yeast to fill each one of those little cells that are creating between the gluten strands with carbon
dioxide and it creates a place for the water to go to so the little water droplets will sit in that bubble that
was created by the carbon dioxide and when you put that in the oven all those tens of thousands of little spaces
in there heat up to create steam when he gets 212 degrees and that’s what creates
your oven spring so we’re basically creating this lattice structure for the East to be able to find a place to put the gas create the
bubbles fill them with water and then Nestle creates your your oven spring so we’re in do stretch and fold number two
at this point though is still really sticky so something people do is typically dip their hand in water it
keeps it from sticking I reach towards the front this feels totally different than did the last time see our our
construction and now you don’t want to rip it I almost ripped it they’re just trying to show an example pull it the
second time let the gravity do the work don’t rip it pulling a third time so
this dough is really firming up it feels a little stickier and now I’m lifting it out of the bottom of the vessel when I
when I stretch that means I’m building that muscle in here I’m building that resistance I’m up off the bottom I fold
it over so that was a pretty aggressive turn again I usually do the first two stretching pretty hard like that then
the last two or three that we do you don’t want to distress the dough very much you definitely don’t want to be
ripping the glutens transfer to be a little bit more gentle with it the next two times around so that’s our second
stretch and fold so you can see we’re layering turning layering turning layer and turning creating that lattice
structure now we need to get our goat temperature up because it’s cooler than
it should be so we’re going to put this in our recruiting chamber which is the oven with the lamb
in the oven I put it a little bit closer to the light to see if that will help I don’t think that’ll help very much so
we’re going to go to plan B which is I need to get more heat in my proofing chamber cup of boiling water actually
I’m going to fill this up to about 500 milliliters fill this with boiling water and put that in the oven just to credit
try to bring the ambient temperature up a little bit and bringing dough temperature off so I have 500 milliliters of water I hated this up in
the microwave it’s almost boiling I’m just going to put this in the oven to try to bring the ambient temperature up and basically putting a heating element
additional heating element in the oven
the temperature inside the oven before I put that in was eighty five point six degrees we’ll see if we can get the
temperature up with our goal being getting the dough temperature up between that range of 78 to 82 degrees
Fahrenheit this is one of the most complicated processes parts of doing the
Tartine bread process because you know Chad Robertson wrote this book based on
baking the dough baking the bread in a commercial bakery so his room
temperature is the bakery temperature aware he has a 900 degree oven running you know most of the day so his room
temperature is 78 to 82 degrees in the bakery when you’re trying to do this in your kitchen you have to try to
replicate that environment that’s what we’re trying to do with this proofing chamber are trying to get this range very difficult to do and it’s probably
the most probably the least understood aspect of this recipe and this will cause a lot of people to fail with this
recipe is that they’re not continually measuring that internal dough temperature so they tend to under proof
the dough through bulk fermentation they tend to cut it too short then by the time you bake the dough comes out pretty
flat you don’t get a good in spring you don’t get a good crumb because you didn’t get the fermentation
into that sweet spot of that 78 to 82 degrees Fahrenheit where the bacteria and the yeast can do
its job that’s really all we’re trying to do here just let those two microbes do their work and they’re a little bit
sluggish now because they prefer it a little warmer and we are a little cooler so we’ve got to get that temperature up
to let them do their job
okay thirty minutes have passed were to stretch and fold number three let’s see
where we are with our dough temperature
so the oven temperature is now 289 degrees Fahrenheit that’s about 31 degrees Celsius so by putting that cup
of boiling water in there and brought the temperature up about three and a half degrees Fahrenheit which is good
let’s see if it’s having any impact on our internal dough temperature
we’re at 77 degrees so it’s climbing but we’re still not in the target range so
we want to be at which is 78 to 82 degrees rest just keep working at it so now we’re on stretching fold number
three at this point we’ve worked the dough quite a bit we should be starting
to see a little bit more billowing it’s a little bit more air in here I’m not seeing too much of that but if you look
around the sides you can see some bubbles forming around the sides of the
dough that’s why we use this glass container so you can see what’s happening so there’s a little bit of
activity in there but not as much as as we would have been a little higher temperature but now we’re starting to
get some of the co2 build-up so when I do the stretch Minh hold now I’m going to be a little bit more gentle with it because I don’t want to press the gas
out of the dough so obstruction fold number three I reached down to the
bottom you really want to pull it from the bottom pulling from the bottom rolling it over the top this is what
creates that structure get down underneath all the way hold from the
bottom this dough is really firming up nicely feels a lot different each time
starting to stick together like a ball it’s coming away from the edges of the container I can’t stretch it as far I’m
not going to force it it’s three I’m pulling from the bottom and layering
across the top it’s kind of like that Jenga game right we hold from the bottom we put it on the top hold from the
bottom put it on the top we’re creating a giant Jenga tower of gluten here that
looks really good and it is starting to get a little more billowy to see when I tap the loaf here you can see it
bouncing a little bit that’s a good sign so that means that the fermentation is working even though our temperature is a
little bit low so we’re basically an hour and a half into this process and we’re still below our desired
temperature but we’re going to keep at it I’m not going to try to get the oven
any higher than 90 degrees because they don’t start to superheat outside of the dough we’re just going to keep it in
there and we’ll see you back in 30 minutes
before we put this back into the oven for 30 minutes we’re actually going to
do something called a windowpane test windowpane test is where we stretch the dough to see how the gluten development
is coming along and it’s called the windowpane because you should be able to stretch the dough super thin so that you
can actually see through the membrane of the dough so I just wet my hand a little bit I just pull a little bit of the
dough up from the top here and I stretch stretch stretch and and you can see I
can see through the dough it’s almost starting to rip but that is really good gluten development that’s the wind you
see there it just tore a little bit so it needs a little bit more but we’re getting good gluten development that’s a good sign that our leaven actually is
working that the gluten is working you can see they’re starting to rip a little
bit we’re definitely getting to where we need to be after basically three instruction pool but we’re not there
entirely you want to be able to do that windowpane test and really stretch that dough a little bit more without ripping
so it means we need a little bit more gluten development but that’s a good test to do periodically in the
stretching the whole process so now back into the oven for 30 minutes
you okay thirty minutes have passed we’re
ready to do our fourth stretch and hold so let’s take the dough out of the oven
and see where we are
okay I’ve refreshed that cup of hot water that I had in there so the internal government temperature is now
about 91 degrees Fahrenheit in 32 degrees Celsius so let’s look at the
dough and you can see it’s getting a little more billowy on top it’s shaking
a little bit that means there’s air bubbles growing inside it but we’re still not getting any of the height that
we would expect because this needs to increase in volume by about 20 percent so we need to see the dough really rise
to the top of the container here before the bulk fermentation is complete we’re
still doing okay we’re only or hour and a half into it I think I said we were going to happen to at the prior break
okay and now we’re finally in the sweet spot from a temperature perspective we are at seventy nine point six degrees
internal dough temperature it’s exactly where we want to be right in the sweet spot between 78 and 82 degrees
Fahrenheit so we finally got the dough temperature up we’re on the fourth
stretch and fold sometimes four is about the maximum that you need to do let’s see where we are here with this one so
I’m gonna reach down to the bottom this dough is really soft and silky feeling now it feels very different it’s
sticking together more and more cohesive all kind of all the way around it’s one
restriction fold really want to go all the way to the bottom and pull that bottom up and over be a little bit more
gentle with it then we were on the first two
pull and fold I’m still developing gluten I can feel the dough I’m pulling
back against me resisting me pulling on it and the fourth turn up and over
that’s looking really good so let’s do
that windowpane test again so I basically grabbed the edge of the dough I pull it up and I stretch stretch
stretch to see how thin I can get this before it rips they call this the windowpane it’s really more like
translucent skin as what this reminds me of it’s so impossible thin that you can
see through it and they’re just ripped they’re tripping again but I’m getting
pretty good pretty good translucency on this and sometimes they’ll get that
tearing just because we have whole wheat in here if this was 100% bread flour
you could really stretch it much longer than that but because we’re using the whole wheat the the wheat bran tends to
actually cut through the gluten when you stretch it like that so we have pretty good gluten development here we’re still
not getting the rise that we need but we’re in the range of the sweet spot for
the temperature now at about 80 degrees so that was the fourth stretch and
pooled usually have an option to do a fifth if you think you need it I’m not
sure yet let’s reassess in 30 minutes this goes back in the oven
you
okay we’re back so we’ve completed for stretching folds now we have an option
to do a fifth one so let’s consult a book the book is
ambiguous the Tartine basic country loaf is ambiguous about what they give you more than four stretch or fold it talks
about doing a minimum of four tucks about doing four with 30-minute breaks during the first two hours of bulk
fermentation it does not talk about doing more folds but it talks about how the dough feels in that third hour so it
implies that there is some stretching and folding being done in the third hour if needed so the book is not clear about
whether we should do more so then we should ask the question why are we doing this in the first place so we’re doing
two things as I mentioned with the stretching fold the first one is by stretching we’re building gluten and by
fooling we’re building that lattice structure of gluten but now that we’ve done four of the stretch and fold
seaweed we did one which is down on the bottom two on top of that three on top of that before on top of that what we
did in stretching fold number one is probably on the bottom of the vessels so once you go past four you’re basically
tearing apart you know the first stretch in full and putting it back on top so this is this is really a toss-up so in
terms of the structure the lattice of gluten I think four turns was enough but
in terms of the elasticity of the dough when I think back to that last windowpane test that we did the dough
was still ripping a little bit sooner than I expected it to we should have
been able to get a little bit more stretch out of that before it was tearing on the windowpane test so let me
take it out of the oven and see where and again I’m just using the hub as a
proof in chain break and not have to heat on in there I have a light bulb warming it up and I have a cup of
boiling water which are refreshed about a half hour ago so we always when we
take our dough out first thing check temperature always need to know what’s going on okay we are at 81 point three
degrees so now we’re pushing the high end of where we want to be which is fantastic because we’ve got off to a little start so now if you look at that
between 78 Fahrenheit 82 degrees Fahrenheit 80 would be the mid point we
want to be on the higher end of that to try to catch up a little bit of that lost time that we had at the beginning we’re still not getting much of any rise
out of this I do see one bubble here falling on the top if we look at the sides of the dough
I do see some bubbles around here so we’re getting some fermentation activity
but this still has a little bit of ways to go from a fermentation perspective but back to the question of v
destruction fold I think based on that last one windowpane test as I mentioned this could use one more stretching fold
just to help build that gluten a little bit more so we’re going to go for it this is the fifth and final and they’ll
be really careful with this because I don’t want to de gas you know push the gas out of the dough because they’re
trying to get it to rise so I just lightly fold that one over reach down
lightly fold and you can see this is really interesting where it’s keeping that Ridge from my finger marks in here
that’s a good sign that we’re getting gluten development in here that this is not kind of snapping back into just a
amorphous ball it’s keeping some of the structure which is evidence of good
gluten development that looks really nice on that turn and we’ll do the fourth one and this is that I definitely don’t want to do more than this because
we’re going to deke ass the dough and you don’t want to over handle this dough
in general the more handling you do the more that you’re compressing the air out
and you’re working against the yeast you know these little yeast cells are working incredibly hard to try to puff
up the dough and every time we dig in there with our big hand where we’re squeezing all that that co2 out of the
cells that he’s just created for us so we’re done handling this dough now we need to let
the yeast do its work the yeast does its best work between 78 and 82 degrees I’m
just going to test this one more time now that we’ve turned it turn some of
the outside temperature to the inside so you can see what’s happened here is the outside edge of this was warmer so now
an internal temperature is actually 85 point two degrees so that’s hotter than we need to be so this is just a
temporary kind of realignment to where the warm dough was on the outside of the
cold dough it’s in the middle so the stretching fold moved the warm dough into the middle but we’re not going to put this back into the oven now because
we’re over our target temperature so I’m going to leave this on the counter top so we’re basically two hours into our
stretch and fold which is now done so we’re really only halfway through the
total a lot of time the book recommends three to four hours for bulk fermentation so we’re at two hours like
I said we’re done stretching and folding we’re going to let this sit on the counter top now I’m going to measure the internal temperature to make sure it
stays in that sweet spot between 78 and 82 but I think we’re done with heating this up in the oven and we’ll check this
every half hour to every hour just to see where we are
okay we just crossed over our three-hour mark of bulk fermentation let’s see where we are so I’ve left this on the
counter for the last hour because the internal temperature was over 82 degrees when we last checked it checking the
internal temperature now [Music]
82.7 that’s still a good inside temperature kind of deep in the middle of the dough out on the edge here near
the glass I can feel that the vessel cooling off a little bit so I would just
want to test along on the glass and we’re still at 80 degrees that’s the
halfway point between our target 80 degrees Fahrenheit I want to leave this on the counter it’s still not rising
very much we’re getting a little bit of bubbling activity if I look on the side to see some bubbles forming but this is
a really slow ferment that’s happening here so we’re going to need to pull four hours at least for all permutation so
I’ll keep an eye on this and we’ll check back in in one hour
we are hours in Vault fermentation and so definitely is rising slowly rising above
that blue tape that I put on just test the internal temperatures where we are
people are sometimes afraid to you know poke this probe in there it’s not a
balloon I mean I don’t think it won’t hurt it so our internal temperature
right in the middle eighty one point nine eight two degrees Fahrenheit still right where we want to be see that
stretch coming out that’s the gluten which is good it’s also test along on the outside to see if the vessel is
cooling down it’s still at 79 degrees right along the edge that’s a good
temperature we’re going to keep going three and a half hours and we’ll see where we are after four hours which was
the planned time
we are at the four hour mark of bulk fermentation this is usually when these
process ends we did not get our 20% rise yet that we’re looking for so we
consulted the book and basically the
last sentence sums it up it says if the dough seems to be developing slowly
extend all fermentation time watch your dough and be flexible so that’s what
we’re going to do this makes sense that it’s taking more than four hours because we got off to a slow start if you recall
the first three stretching holds that we did in the first hour or so hour and a
half we’re below the desired temperature of 78 degrees Fahrenheit so the
fermentation really did not kick in until somewhere between an hour an hour and a half so it makes sense we’ll
probably need another hour to let this go let’s check the internal temperature one more time to see if we’re still in the
sweet spot
eighty point eight degrees that’s good we’re going to leave it on the counter let it continue
so the fifth beginner mistake that people make is impatience this is a long
process it can be a complicated process it can be a frustrating process and there’s a tendency by everybody myself
included to just want to kind of plow through the process and get it done because it takes a long time but you
have to realize that you’re not in charge of the process the East is in charge of the process and you’re just
the coach you’re the helper to the east and the lactic acid bacteria they’re
really running the show and all you’re doing is helping them do their job so there’ll be points in the process
where you need to decide or you’re going to speed up slow down add temperature take away temperature go back and reduce
something as possible because it never works as planned and even following a recipe strictly time and time and time
again there are so many environmental factors that can influence your bake that you just have to be able to deal
with uncertainty and always ask the question am i rushing through this
because rushing through the process generally is a bad thing
okay we are at five hours of bulk fermentation this is still rising it’s
not quite at 20% increase in size yet but it’s still going our internal
temperature is still about 80 degrees so we’ll let this go another half hour or
so and I think we’ll call it we’ll see where it ends up
[Music]
okay we are at five and a half hours of bulk fermentation and we are done take a
look at what we have here the dough is just touching the plastic wrap on the top you can see from the line here that
it’s risen about 20% it’s domed up on the top and this vessel is a little smaller on the bottom that it is on the
top so think about one fifth of the volume it’s at least one fifth I think it’s wrong by about 25% actually so
we’re in good shape it took longer than expected the the Tartine process calls
for bulk fermentation of three to four hours this took five and a half hours and that was explainable really by two
reasons one was as we were tracking our temperature when we started our stretch in full our doze was below the target
temperature we were in the mid 70 degrees Fahrenheit 75 76 degrees and the
yeast really doesn’t start fermenting in this quantity to rate raise the dough
that’s much until it’s in that range of 78 to 82 degrees Fahrenheit so we lost about an hour of fermentation time right
off the bat and because we were tracking that time it was explainable when we got to the four hour mark why the dough
hadn’t risen so we knew we had at least an hour of ketchup to do so this is also
a great example of two things one is this is really an exercise in patience
you know it’s very easy to get anxious and just try to rush the process and move through this as fast as possible
you really have to relinquish control because there’s not a lot of things that we have control over and you have to
just realize that the yeast is doing work here you can’t make it you can’t do the work of the yeast it’s the only one
who can do it but the second thing is that we can help these do the work by
controlling temperature in time which is what we did we created our proofing chamber in the oven
we got the temperature up the sweet spot where it needed to be and we gave the east the time that it needed to do its
work it rose by 20 percent you can see there’s a tremendous amount of bubbles around the edges of the container here
which is exactly what we’re looking for we remove the tape if I remove the tape so we can see there
are bubbles all around on all sides of this that’s a sign of good fermentation and if we also jiggle this you can see
that it’s moving quite a bit because it’s full of air bubbles which is exactly what we want so this dough looks really good right
now so this is the official end of all fermentation now we’re moving into
shaping the loaves
now we’re moving into shaping the loaves to start shaping globes we use a dough
scraper and we’re going to remove the dough gently from this container onto an
unflattering and just gonna dump it out and kind of scrape it out and and this just has
tremendous gluten formation you can see these strands of gluten coming out looks
wonderful and similarly we want to avoid
the point over handling this dough as much as possible okay so we have our
dough on our unflavored work surface now when we’re doing this rough shaping
essentially what we’re doing is establishing the top and the bottom of the dough and it’s important to remember
that you want flour only on the top you don’t want flour on the bottom because
the bottom is going to create an airtight seal when we end up shaping and
sealing the bottom and if we get flour on the bottom the dough won’t stick to itself so we’re really focused on
establishing the top flour on the top because that’s going to become the crust and keeping the flour off the bottom so
we just use our bread flour to do this very lightly flour you really want to
use as little flour as possible because you don’t want to add a lot of raw flour into the process at this point because
it’s not going to ferment anymore sort then we’re just smoothing our dough with
that flour to establish the top and to
make it somewhat workable so that we can handle it you need a little bit of flour in this so I’m just patting very gently
that flour around the edges so that we can handle
so I kind of took a little bit up here just around that bottom edge but not
under because we don’t want to get flour on the bottom so I would stablish the
top and bottom so I floured the top and at the bottom now we’re ready to begin rough shaping the lows so I take a bench
knife and I cut this right down the middle and if you recall this recipe makes two loaves this dough is really
Airy so we cut through this and separate
the two loaves and now I’m going to carefully flip this one so the floured
side is down and I’m the second loaf
normally this makes two loaves which is more than I need right now I’m going to create one full-size loaf to correspond
with the recipe I’m going to create one half sized loaf so I’m gonna cut this
one in half and then this remaining piece this quarter of the recipe or half
of a half it’s the perfect size that you need for a pizza so I’m going to save that professional
paper I’m gonna make a pizza with that probably tomorrow I’ll put that in the
refrigerator so I’m just gonna keep that dough you don’t need to do anything else with that dough a traitor to make pizza as is it doesn’t need any additional
proofing it makes fantastic pizza crust okay so I’ve split this now into two
loaves we’ll call this the large loaf and the small loaf I flip this one over I did not flip this one yet so I’m
flipping the small one over as a half size little so I have my full size in my
half size now what we need to do is to start to shape this so we just carefully
grab the floured side which was the top and pull it onto itself
kind of tuck it pull it tuck it hole and
I’m really pressing this together because I’m trying to create as I mentioned an airtight seal bread is one
of the only foods that comes with its own pressure cooker so if you create an airtight seal you’ll actually be able to
create an oven inside the oven that’s going to steam up the spread and give
you that incredible oven spring that we’re looking for so I just kind of squeeze this together this is very
sticky I’m not using much flour here so this is a very rough shaping now I’m
gonna flip this back over to my floured side up is really sticky so I need a
little more flour can’t even handle it
so you’ll kind of know when you have enough flour and when you don’t hold it down they’re not a flower on this
because I can’t even handle this dough then I use the bench knife to basically
do a rough shaping of this I’m struggling with this is a technique
where you basically pull the bench knife under the dough and you’re kind of
pushing the sticky part of the dough together on the bottom not over handling
or manhandling this too much and we’re trying to build surface tension on the
top you can see as I’m doing this I’m stretching the dough I’m kind of
grabbing the very bottom corner of the dough with the bench knife and pushing it which is stretching and stretching
stretching stretching the top creating that surface tension and when I get it
into something shaped like that I stop messing with it this one this is our
bottom so it fold fold fold fold just
folding this onto itself it’s very sticky credibly sticky before I flip
this one I’m just gonna flour my hands a little bit to get around the sides get
that perfectly sealed bottom to create our pressure cooker
get the flour off of the mat here not put the top side back over they don’t
float ladies here I’m sorry this one a little more this is our half size loaf
and then do the same thing I push the bench scraper under it I’m grabbing the
dough with a very lip of the bench scraper pushing it towards the center
because what I’m doing is stretching the dough on the top I really want to stretch stretch create surface tension
from stretching I’m stretching there are videos of experts doing this so much
better at it than I am but you’re but the idea is you’re doing two things here
sealing the bottom so you don’t want flour on the bottom and stretching the
dough to create the surface tension this will create the crust
that looks pretty good again not very elegant for me doing that but that’s the
result that we want this is our full-size slope and our half side slope now we’re going to give this a bench
rest of twenty to thirty minutes you want to cover this with a towel to make
sure that it doesn’t get any drafts on it which will dry out the crust so we now cover and bench rest for thirty
minutes
you
okay the locals have been resting the rough shaped loaves have been resting for about twenty to thirty minutes you
can see they spread out a little bit like a pancake but they do retain their shape now we’re going to start the final
shaping so I’ll start with Larkin again
we’re going to flour the top one more time really establish which side our top
is and that helps build the crust and
then at the same time if you want to try to keep the flour off of the bottom so I
try to keep a clean workspace here lately flowering the top again this is
just with my bread flour you see some
bubbles forming on the top that’s a good sign okay now we’re going to flip this over
trying to maintain that round shape and there’s a series of folds that we do
here the first one is we pull this towards us and we fold it over like this
one-third then we stretch this out like
this you fold one here fold one here really press that down together and then
we grab the top this is really sticky and we want to keep that sticky because that’s the glue that holds the whole
package together so that’s a really puffy nice shape loaf it pinched the
seams together again to create as much of an airtight seal as I can but now this isn’t very round anymore it’s a
little bit rectangular so we flip it one more time and now we create the surface tension by
using our hands to push underneath you don’t want to manhandle this too much
just trying to stretch the dough keep the sticky dough on the bottom sticking to itself so we’re still sealing the
bottom and that’s it not going to mess with that one so then we take this and a
lot of people will then prepare this for final proofing you can either proof this at room temperature for three or four hours or in the refrigerator overnight
which is what we’re gonna do so we will put these into our shaping bowls and put
it in the refrigerator for about 12 hours or so so let me do this first one some people use banna tongs that’s the
traditional baskets that are used in France I just use glass bowls with these
flour sack cloths in them so what I do is I take a mix of 50% white flour and
50% rice flour this is what’s recommended in the Tartine book and you
basically spread that on best how I rub it into the towel you really want to
impregnate the the flour into the towel as much as possible you don’t want a lot
of loose raw flour sitting on the top and this combination of rice flour and bread flour keeps the dough from
sticking to the cloth you want to make sure that that’s good and covered
because there’s nothing worse than taking us out in the morning and not being able to get your dough off of the
cloth so that’s sufficiently flour I lay
that into this bowl and then the trick
here is we’re going to flip this and put the top side down the bottom side up so
and in one motion I flip it there it is that bottom is sealed up really nicely
that’s a really nice looking loaf in it’s shaping Bowl okay so this is ready
to go into the refrigerator so I usually just cover this with the towel
and also cover it with plastic wrap so that doesn’t dry out and then this will go in the refrigerator for 12 hours we
also have our small loaf just gonna move this into the center so I can work this a little bit it’s still like any flour
the top just give your crust try to
clear flour away so we don’t get it on the bottom accidentally I flipped this
top side down I pull 1/3 of it toward me
this has a little less mass so it’s gonna want to slide towards you
pull 1/3 towards me I flip that over I stretch it out this way flip one from
the left one from the right I grab my sticky seam on the top roll that over
and there we are I used my hands and with pushing and
turning with the sides of my hands to create a little more surface tension so I’m stretching the dough stretching
stretching and getting the dough to stick to itself I pop that big bubble on the surface and I already prepared this
Fannett on this is a smaller Bowl for this specifically for this size I grab
that loaf and I flip it over and this one opened up a little bit on the bottom so I just pinched that together because
we want an airtight seal always on the bottom of our lows that helps with love
in the spring
okay so this one is also ready to go in the refrigerator I’ll put a plastic cap
over this and these will both cone or frigerator for 12 hours and so we’re done for today
day two that’s a wrap and we’ll pick this up tomorrow morning for the scoring
and baking
you
so it’s the morning of day 3 we’re on the home stretch thank you for sticking with me on this sourdough journey today
we bake the first thing we want to do this morning is set up and preheat our oven what I’m going to do is remove our
middle rack from the oven and I’ll leave to Rex in the bottom of the oven and I’m going to preheat to 500 degrees
Fahrenheit which is 260 degrees Celsius
as we get ready to to bake we want to heat up our oven as hot as possible so
we’re going to heat it up – I have it set to preheat to 500 degrees we’ll be baking our bread in a Dutch oven this is
the preferred method Tartini recipe book and the reason that
we’re using in Dutch oven is because we’re trying to approximate the environment of a commercial bakery in in
a commercial bakery they they bake a super high temperatures higher than what you would have in your home oven and
they inject steam into that baking environment that’s what gives the bread
its unique crust what we’re doing here is trying to approximate those two factors by using this heavy Dutch oven
we’re essentially bringing the walls of the oven in much closer to the bread so we’re radiating more heat right on
the red and trying to approximate that higher temperature environment or essentially creating an oven within the
oven and then the second thing that we’re doing is by using a heavy lid to
seal this we’re sealing in all the steam that’s coming off of the bread so as
that 750 grams of water that we added to our recipe yesterday is steaming off of
the bread it’s staying this enclosed vessel and it’s essentially creating that environment that steaming environment for the first 20 minutes of
the bake that will really create that crispy crust that’s the reason that we use the duck chopping we want to
preheat the Dutch oven at the same time that we’re eating the oven and as you’re
beginning to bake bread it’s important to test the calibration of your oven to
ensure that it’s actually reaching the appropriate temperatures some ovens can easily be off by 10 or 15 degrees
sometimes more there’s something’s defective so I have one of these inexpensive oven thermometers that I
used originally in my oven to make sure that when I’m heating the oven to 500 degrees it actually reads on a second
device that was 500 degrees so my oven thermostat is correct but the interesting thing that I did one time is
I is to heat my Dutch oven with the lid on so I put my thermometer in the Dutch
oven heated the oven to 500 degrees so the bell went off and said I’m at 500
degrees I looked in the Dutch oven and inside of the Dutch oven was only 260 degrees Fahrenheit so I was I was under
baking the bread because it wasn’t letting the Dutch oven actually heat up to 500 degrees I was letting the ambient
air temperature in the oven heat up to 500 so you needed to heat up the inside of the Dutch oven to 500 degrees which
usually takes longer than if you just wait for your oven to tell you it’s at
500 degrees Fahrenheit so I still used this I’m going to put this inside the Dutch oven so I can double-check that
and I am pre filled with the oven on the lid of the Dutch oven slightly open to a
little bit hot air into the oven some people actually if your rack allows it you can stack it like this you could put
this on that second bottom rack that I have in there was one of the reasons that I leave to rec centers I could put
this underneath but it’s easy to burn myself when I’m doing this I don’t do that anymore so I just probably this
works pretty well if I leave the lid askew so I’m going to put this into the oven and get this going
one of the other problems that many people have when they bake in a Dutch oven is it burns the bottom of the bread
it’s a very common that happened to me when I first started baking so a little
technique that people use I take this heavy baking pan and actually put this on the rack under ektu rex in the oven
up with us on the rack under the Dutch oven so it basically creates two air spaces before that heat that’s coming
off the bottom of the oven hits the bottom of the Dutch oven first it comes off the bottom of the oven it hits this
and I put it upside down so it actually diverts the air versus the hot air around the sides but instead of
radiating right on the bottom of the Dutch oven and then there’s a small maybe a one inch gap between this the next rack and
the bottom of the Dutch oven so this immediately stopped the bottoms of my bread from burning in the Dutch oven
want to put this here so that is set up
and ready to go and the last thing that I’ve prepared in advance is parchment paper I like to
bake the bread on parchment paper inside of the Dutch oven and we’ll also use
this for scouring the ground I’ll put the loaves I’m here you can actually turn this really easily which helps with
your scoring I also cut these into a little bit of an oval shape so that before piece of parchment paper will fit
down inside the Dutch oven if you just use a rectangular piece the paper won’t fit in the Dutch oven and you’ll have
the little corners of the paper sticking out of the top of the Dutch oven which can let steam escape so yesterday you
know as you’re standing around killing time waiting for ballpen fermentation or whatever you can cut your parchment
paper into this oval shape you’ll see put this in it works perfectly and then
it leaves two handles on each side to basically look at the thread out when we’re done it also keeps it from
sticking to the bottom some people could put cornmeal in the bottom of the Dutch oven to keep it from sticking I don’t
prefer to do that just because I don’t want to add the corn meal taste to my bread if it’s a matter of taste preference you can certainly do that as
well but if you’re using the Dutch or if you’re using the parchment paper in the Dutch oven you generally don’t need to
put any kind of product on the bottom of the bread to keep it from sticking
before we move forward I just want to remind everybody today especially to be
very country interest about your safety when you’re working in the kitchen today we’re going to be working with very sharp razor blades to do the scoring and
extremely hot temperatures in the oven the Dutch oven 500 plus degrees it’s very easy to burn herself so you should
have a good good pair of oven mitts this is a really high temperature oven mitt
with this long sleeve sometimes when you’re reaching in the oven you’ll burn the top of your hand if you’re reaching into your Dutch oven you can burn your
forearms so it’s good to have a long mint like this I also like to use one of
these very grippy silicon grabbers which give me a little better grip even though I’m exposing the back of my hand
sometimes I want to really better grip on something heavy so I use these the one thing you have to be careful with
with these though is there’s this little hanging hole in them and for some reason my thumb will always find that one it’s
500 degrees on the other side of that so be very careful if you’re using these silicone have mitts hot pads with the
holes in them when I put the items on my counter I use these flap silicone trivets just
to make sure that these don’t burn I do not use these for taking things in and out of the oven they’re just too floppy
on me they just don’t have a good grip so I don’t recommend these but these are great for putting hot items on your
countertop
we’ve been preheating the oven for about 20 minutes and preheat alarm just went
off to say that we’re at 500 degrees so I’m going to check that thermometer inside the Dutch oven and do this very
carefully it’s very hot so here’s our thermometer that’s inside the Dutch oven
this is pretty consistent with what I’ve seen before the oven thermometer just
went off and said that we’re at 500 degrees the Dutch oven the inside of the Dutch oven with the lid partially off is
at 300 degrees so if we have gone ahead and start our baking now when the oven
is you know quote at 500 degrees Fahrenheit we would have been not
getting that full heat on the initial bake which gives a tremendous oven spring that we’re looking for so it’s
very important to try this a couple of times and really figure out how much longer your oven needs to heat up before
the inside of your Dutch oven gets to about 500 degrees Fahrenheit
you our secondary thermometer in the Dutch
oven is up to 500 degrees now to exactly one hour from when I started to pre-heat the oven the oven said it was a
temperature at about thirty minutes and it took another 30 minutes almost double the time to get the inside of the Dutch
oven up to the 500 degree fahrenheit temperature which is 260 degrees Celsius
our next step in the process now that the oven is heated up in the Dutch oven is sufficiently heated is scouring so we
put our loaves in the refrigerator last night for what’s called a cold proof or
a cold and essentially what we’re doing is still fermenting the dough but
we’ve really slowed down the process if we had done a room temperature final proofing we would have left it on the
countertop for three or four hours as an alternative you can slow the process down there pretty rater for eight to 12
hours we actually went about fourteen or fifteen hours actually in the
refrigerator the in the refrigerator is one of the parts of the process where you can really stretch out
the time some people even leave their dough in the refrigerator for their final cold proof for 36 48 hours as you
leave it in the refrigerator the acidic flavor will start to take over and you’ll get a more sour flavor though
some people prefer that some people don’t the Tartine recipe as I’ve mentioned a couple of times
is not a super sour tangy loaf so it’s essentially a relatively short cold
return of 8 to 12 hours so going 15 hours doesn’t make a big difference it
might add a little bit more complexity to the flavor so let me grab the large
loaf out of the refrigerator okay so we
made a large loaf and a small small loaf this is the large loaf I’m taking this out of the refrigerator
opening this up and as you can see this puffed up a little bit in the
refrigerator from when we put it in you won’t get a big rise in the refrigerator because we’ve significantly slowed down
the microbiological activity in here so this is not like using traditional
commercial yeast where your final proof you’ll see you know the dough you know
increasing fifty percent or more in size it was still a little bit of a puffing up here all we’re trying to do is really
maintain the shape and if you recall we put this in with the top side down so we’re looking at the bottom of the
louver and what we’re going to do now before we score its just put a little bit of this is white rice flour this is
not the 50-50 mix of rice flour and wheat flour that we used on the top of
the loaf this is just rice flour the reason we put this on the bottom is to keep this from sticking and this is
we’re using rice flour because rice flour is gluten free and if we had put
bread flour on here we were trying to have this not stick to the parchment paper or the Dutch oven we would be
introducing gluten to the bottom of the loaf and we don’t want gluten on the
bottom of the loaf because the first three letters of gluten spell blue and that would essentially cause this to
stick to the parchment or the Dutch oven so you want to use a gluten-free either
cornmeal or what’s called for it and the Tartine process is white rice flour also
on all of my loads travel with their own thermometers this was 36 degrees when I took it out of the refrigerator always
like to know what my refrigerator temperature is so I can add that to my notes and now we’re ready for scoring as
we get ready to score the loaf you have a lot of different options of what tools to use this is the classic tool that’s
typically used by bread makers this is called a LOM L AM II that’s the French
word for blade and this is essentially a double edge razor blade on this little stick you can make one of these some
people put these on the end of a chopstick or a coffee syrup I really need a very sharp blade
you could use your sharpest knife out of your kitchen drawer if you have something like that some people use a
craft knife or an exacto knife or even a medical scalpel for people who are in
the medical profession you can also use a box cutter which has a single-edged
blade in it some people will just use a
double-edged blade freehand without the stick that’s kind of dangerous so I don’t recommend that if you do want the
flexibility of just using a blade you can use a single-edged blade this is what’s in the box cutter so you can put
your finger on this side on the top side without cutting yourself you need a lot of flexibility to do real intricate cuts
that way there are all kinds of blade holders out there I don’t recommend holding the double-edged blade with your
finger on the top of it that’s just unsafe so those are our scoring tools
now let’s talk about why do we even need to score the dough or the loaf there are
two reasons one is we need to tell the loaf where we want it to open up so when
we put this loaf in the oven we have 750 grams of water in here we have our yeast
which is going to get one final glance of creation of co2 as the temperature
increases the East will go crazy and give one last gasp before they meet
their maker at 130 degrees Fahrenheit so the the loaf you really wanted to puff
up that’s called the oven spring and if you don’t tell the loaf where you want it to open up it will just blow out the
weakest part of the loaf and if you don’t score the loaf there’s almost a hundred percent certainty that you will
get a blowout in the side so you want to tell the loaf where do you want it to open up the second reason that we do
scoring is really traditionally to identify the loaves so back in medieval
times people didn’t in their homes they had a community oven in the town so even multiple bakers
would use the same oven so each Baker would score their loaves to identify which lows were there so
when they all loaded their lobes in the communal oven they knew which was which and that was also their brand branding
or brand signature trademark on their loaves and then in the afternoon when the bakers were done baking individuals
from the community could bring their dough and put that in ovens and now you have 20 30 40 people making different
lows so everybody would would score their lowest with their own signature so when you went back to the eighth Earl ofall you’re not fighting with your
neighbor over hey that’s my loaf no that’s mine so everybody did their own signature now people do the scoring also
for just creative flair to really not only identify the loaf as your
individual product are also going to do something creative and we’ll do a little bit of both we’ll do a functional deep
cut to tell the loaf where to open up and we’ll do a little creative loaf there are real artists out there if
you’re interested in that type of scoring what I call the artistic scoring
there are tons of videos on the internet where you can see some real artists doing that type of work with their bread
scoring so in order to score below and
we’re gonna take our parchment paper put it on the bottom our hand over the
top of this we Center it and then I’m just going to flip this in one motion on
the parchment paper carefully remove the bowl set that aside and then carefully
remove the towel that looks perfect so
that kept its shape overnight that was the reason that we put it in the shaping Bowl or some people use making baskets
called Benetton’s now we need to score the logo by putting
this on the parchment paper it also gives you the ability to turn it like this so if they’re doing a decorative type of scoring some people
will even put these on a cake decorating turntable if you’re really into this
because if you’re right-handed you want to kind of score from the right side versus the left so you want to be able
to turn your loaf so don’t put your look directly on your countertop because it’s very tough to turn it for scoring
purposes so if you read the instructions
or guidance on how to score the loaf you’ll hear things like experts will say
you should score the loaf confidently what does that mean like confidently
like I got this like I can do this I’m like I think what they mean is don’t saw
through the loaf like just make one sweeping cut at one time don’t be hesitant with your with your movements
so we’re just going to go for it and again I’m not an expert this but I’m going to do up a deep cut along the side
here because I want the loaf to open up this way so I just start here and you want to cut deeper than you think you
need to and Ken don’t saw through it just keep moving keep moving keep moving
that’s a pretty good cut and so that’s my functional cut that’s going to allow
the lope to open up this way when the oven spring starts and then these different tool just to demonstrate this
as well crackling I turn it this way because I’m right-handed and we can do a little decorative
scoring and I’m not cutting as deeply if you’re doing the decorative scoring you’re just piercing through the skin
and I’ll do the kind of wheat branch here which is a pretty common scoring
pattern on bread
sometimes these works sometimes they don’t it all depends on how much of them spring you get how brown your your
crusts ends up being so that’s it so I did my functional cut and decorative cut
now we’re ready to put this into the oven you can see that’s flattening out
already the dough as soon as we take it out the refrigerator starts to flatten out and open up so you want to move
quickly here and sometimes in the past I made the mistake of taking the dough out
and scoring it before the oven was preheated then I have my dough sitting here opening up while I’m waiting for
the oven to preheat so you don’t want to do that always waited to layer up and there’s a hundred percent preheater that until you take the loaf out and score it
so now I use my
[Music] a loaf pan you don’t want to leave the
door open like I just did you want to keep the oven and closed as long as possible and we carefully use the
handles on our parchment paper very carefully despite when their degree is
very hot with that in there I put the lid on here’s where you can see because
I cut the parchment paper and on a parchment paper sticking out at the top of this which would create a path for steam to come out and I get this back
and we immediately reduce the oven
temperature of 450 degrees Fahrenheit which is 230 degrees Celsius and we set
a timer for 20 minutes
what I like to do is go back and check my yesterday I was keeping notes all day yesterday so I’d like to have a record
of how the process went so I could go back and refer to this in the future because these states all tend to run
together over time so you really want to keep accurate records about the time and temperature I even draw a picture of the
scoring pattern that I use them different lobes so let’s do a quick
recap of how the process went over the last two days so far so if you recall on
the evening of day one we made the Levin the recipe calls for that to to basically build eleven overnight I
approximated that to be twelve hours it ended up taking about fourteen hours then on the morning of day two we did
the auto release process where we at the eleven with the flour and water which is
technically ferment Elise would let that go for about 40 minutes we then added the salt mix the salt in and officially
started the bulk fermentation process which was estimated to run from three to four hours according to the book but
because we got off to a slow start both with the leaven activity and with the
temperature of the dough our fermentation process took five and a half hours which was a little bit longer
than normal after that we divided the Lovis we let them sit and do a 30-minute bench rest and then did our final
shaping that whole process takes about an hour then we put the logos into our proofing baskets and put those into the
refrigerator where they typically go from eight to twelve hours I let them go
about fourteen hours you have a lot of flexibility on that final cold or
cold proofing that you do in the refrigerator and I also didn’t feel like getting up at 3 o’clock or 4 o’clock in
the morning to bake so you can let that go a little bit longer that’s where you have the most flexibility in my opinion
to let the time stretch out to accommodate your schedule some people
would look at these times and say this is crazy it takes three days to make a loaf of bread how is this possible how can I do this
and fitted into my schedule what I did when we went through the process over the last you know roughly 36 hours is I
tried to adhere to the to the the basic timeline in the Tartine bread recipe
just to prove out that the times and temperatures really work but you have a lot of flexibility there’s even a whole
section in the book and with other recipes there are ways to modify the timing to work around your schedule you
can slow down the process of many different points throughout the process by cooling the temperature now putting
the dough in the refrigerator so people have found a way to do this to work around busy schedules you don’t need to
do all this you know continuous time of the back-to-back process the way that we
did so if you’re interested in getting into this and the time is a little bit daunting I didn’t suggest reading up on
some of those other recommendations for how to spread out the time schedule or work with your own personal schedule
people people find a way to make more
oK we’ve been baking for 20 minutes at 450 degrees this is the first moment of
truth we’ve been baking with the lid on now we need to take the lid off so I’m going to be carefully and quickly and
now look at the ovens spring that looks pretty good so we had a pretty flat loaf it came up
about 2/3 of the way in the Dutch oven quickly close the oven back up we’re
going to go another 20 minutes and check back in
my 20-minute timer just went off so we’ve finished our 22nd 20 minutes baking of 450 the first 20 minutes for
with the lid on second 20 minutes are with the lid off the recipe calls for
this with the lid off to go 20 to 25 minutes and to get to an internal temperature of 212 degrees I’m actually
going to take the local out of the oven and see where we are right now I’m going to take the internal temperature and look at the local Zoo how it looks okay
this looks really good the first thing that I notice is the oven spring that’s the height of the loaf in the pan so
when we put the loaf in the pan it had flattened out to maybe I don’t know two
inches high it’s four and a half or five inches high which is fantastic of them spring I look at the color of the crust
we got this dark almost burnt crust around the edge there where we scored the loaf that’s called the ear that’s
kind of a classic look that you want where it’s almost burned right on the edge of the ear and then I look around
the edges it’s still a little bit light if I look down into the Dutch oven here it’s a little light around the bottom
and I’m not smelling it doesn’t smell like it’s burning on the actual bottom so let’s take an internal temperature we
don’t waste a lot of time here we’re looking for internal temperature of 212
degrees Fahrenheit or 100 degrees Celsius that will tell us if the inside
of the loaf is Beit sufficiently you don’t want to undercook the inside it’ll
come out kind of gummy and doughy and we are at 200 11.1 so that’s really close
to being done I see a little bit of dough came out it’s a little soft so what I’m going to put this back in for
two reasons one is we’re just at temperature 212 and the bottom edge of
this is still a little bit light and I want a little bit browner crust so at this point once you get to 212 it’s
really personal preference as to how much longer you want to bake and how dark a crust you want I’m going to keep
this one in for about 10 more minutes I’ll just monitor this through the
window of my oven you don’t want to be
opening and closing the oven or leaving the bread out for a long time like I just did so we’ll give it about 10 more
minutes and and see where we are but so far it’s looking pretty good okay
actually let the brick go five more minutes and it looks done based on the color so I’m going to take it out so
we’ve taken our loaf out of the oven like carefully very carefully degrees
very carefully lift up my parchment paper take a look at the loaf
that’s really nice little love let’s do one more temperature test just for the
record test our internal temperature
212 degrees exactly and it went exactly what the recipe called for 20 minutes
just the lid on 25 minutes with the lid off so now what we do is hot carefully
lift it off of her parchment paper throw this away and I have a small brush this
is just a paintbrush that I use just for bread and you just want to brush that
rice flour off dress the loaf a little bit nobody wants a mouthful of raw flour
when you bite into your bread so I’m just getting that off the bottom if you
remember we put quite a bit on the bottom let’s make sure that it doesn’t stick and it did not I also take a
closer look at the bottom and this did not run this is really perfect you can you can tap on the loaf it has that
hollow sound which people look for I brushed the loose flour off of the loop
here and then we observed the loaf so what happened this deep scouring that I
did really came out beautifully remember that’s where we told the loaf where we wanted it to open it opened up exactly
how we wanted it to do that this little dark round Ridge is called the ear and
something that a lot of Baker’s look for I’ve rarely gotten that in my Louis before we had a little bit of an
explosion here on the top so that means that I could have done a little bit deeper or larger scoring because I had a
blowout here on the top of the loaf and then that little decorative scouring along the back edge you can’t see it
very well I could have done that a little deeper so my scoring game is not great but that
really nice listing well if you look at the color and it’s this combination of dark brown and light brown there’s also
this dimpling around the edges which is really desirable that people look for in a good baby so that’s really I’m really
happy with that look right now we just
going to brush some of this flour off of
here and now the next step in the process is to document our work so if
you have a camera you always wanted to take a picture of your loaf so that it
goes with your your cheap sheet so that you have all of your notes of what went
right what went wrong and you have evidence with a picture of the loaf
that’s a nice slope that’s pretty where I turn this way
gorgeous one more for the cameras month for the camera nice you can stage this I can put my
charts in book on here so I remember what recipe I followed that’s a nice
slope that’s a nice picture you can make Christmas cards out of that you can post on Instagram you can send it for friends
this looks really good now what do we knew next
we eat it I have my knife I have my
butter I like to cut cross whizzed across the ear like this I’m kidding
oh you think I’m crazy never cut into a warm loaf you always have to let the low
cool for 90 minutes because it’s still cooking so put the knife away just step
away put it in your drawer thing with the burner way whatever you do do not
cut into your warm loaf it’s not done yet so we’re gonna let this sit what just
yeah touch that Pam that’s 900 degree or 500 degrees don’t want to do that we’re
gonna set the loaf on a cooling rack let this cool for 90 minutes it’ll be totally cool by then then we’ll cut that
open and see what our inside or crumb looks like and we’ll be back in 90
minutes in the meantime I’m gonna make the mini loaf so if you recall I made
the large loaf and a half size loaf you want to get that out of the refrigerator and we will start that process in a
moment
our first loaf is cooling and now we are going to make the second loaf if you
recall which is a half sized loaf so let’s back up the recipe 13 recipe calls
for enough ingredients to make two of the full-size loaves if you recall after
the bulk fermentation before we did the shaping I divided the loaf so this is half of the recipe which makes one
full-sized loaf I took the other half and divide it into two one of which makes a half sized loaf and the other
makes pizza dough which I have in the refrigerator and I’ll be having pizza later tonight so these half-size loaves
are great they if you have a small household or a small appetite for bread
sometimes this is too big for two people to eat the full-size loaf so I’ve made
the half size lobes a couple of times I really like that size so I’m going to include that here this kind of bonus
material because these these are really popular at least in my household so how
do we if you wanted to make a half size recipe you can actually just divide the
recipe down if you divide the recipe in half the standard recipe you get one loaf if you divide the recipe into 1/4
of what we just made here you get a 250 gram flour weight recipe which is what
we use for the half size loaves and I’ve done that a couple of times and their
reduced recipe works but the processing times are all the same the baking time is maybe 5 minutes shorter with the lid
on in 5 minutes shorter with the lid off but if you really just follow the recipe do the math can reduce the quantity as
it works so let me grab this low cloud of the refrigerator it’s been cold proofing in the refrigerator for about
15 almost 16 hours now so this slope might be a little more sour the longer
you leave it in the refrigerator for the colder it’s hard the morse hour ago gap
so here’s our small loaf and it’s shaping all that we put together
yesterday all of my lobes travel with a thermometer and this is really interesting I took this this was on the
top shelf of the refrigerator it’s forty four point two T’s Fahrenheit when I took the dough out of the bottom shelf
of the refrigerator for this slope it was thirty six degrees Fahrenheit so the difference between the top shelf and
bottom shelf is eight degrees so that’s important to know when you’re putting
things that are frigerator and they come out differently one time versus another kind you can have you know eight degree
difference in your refrigerator and the comes to in a super-long proofing of the say 24 or 36 some people go up to 48
hours if they want to really sour or glow eight degrees makes a big
difference across that along the time period so we have our cold dough coming
out of the refrigerator I just used my pure rice flour on the bottom to keep
this from sticking we didn’t have any trouble with the bottom sticking on our
large loop thank you this trick where
I’m going to flip this out of the proofing and shaping basket onto my
parchment paper I remove the bowl set
that aside and I carefully remove the towel set that aside that did not stick
so that’s a good sign I have a big clump of flour right here which I’m just going to lightly brush off
no need for that on the top like that okay so this is my small look and the
way that I like to score this is a little different than the large loaves I’ve made these small loaves a few times
and because there’s a smaller mass here when we cook it when we bake it this
loaf wants to stand up out of the pan so the first time I made this recipe this looks like a giant dildo it was kind of
tall and round because the crust is going to want to pull this up out of the pan with the large loaf you have this
mass but it’s just more weight so that look wants to sit down in the pan a little bit more so on this one if I want
the look to sit down the pan I have to score the top of it more so that I’m letting the top of the loaf count
blossom to let that air out but some of the the steam and gas out to let the
loaf sit down in the pan it was just a preference from doing this a couple of times so I’ve devised my own kind of
scoring panel for this based on that style I think of I want this to open up
kind of like a tulip bulb so I’m going to do a spiral or a pinion actually in that spiral it’s actually a pinwheel
cut and do this fairly quickly so I basically do these curves off the center
going around below and this is where you want to spin the parchment paper as you
go and I’m cutting a little deeper on
the top of the loaf and on the bottom again because I want to tell the loaf where to Oakland so it will open where I
do the deepest cuts and then as I come around that bottom I’m just scoring a little bit more lightly I’m losing my
curve here a little bit getting my curve back
and there is the pinwheel style scoring
of the slope that looks pretty good just gonna brush some of the excess
flour off my Dutch oven is in the oven right now fully preheated to 500 degrees
I’m going to grab that
I use a 2-quart Dutch note for this you want the size of your Dutch something to
closely match the size of the loaf so I picked up the smart oven at a discount
store there’s my internal temperature 500 degrees I set that aside and I carefully
pick up the local it didn’t quite get this in the center so I don’t have a great handle on the left you have a
little excess on the right very careful this is incredibly hot and here you can
see even though I cut this as an oval because I didn’t Center it on the the
parchment very effectively I have a little ear sticking out here so I want
to make sure that that goes in the side of the pan so it doesn’t interrupt my seal again this is a 2 quart Dutch oven
and this goes in for 20 minutes with the lid on 450 degrees exactly the same as
before because this loaf is smaller it’s possible that it cook that it bakes a little quicker you could check it after
15 minutes if you want I think the last time I did this I let it go for 20 minutes with the lid on so I’m going to
do that again I’m setting my timer for 20 minutes and we’ll take the lid off at
that time in C order
our half-size slope has been in the oven for 20 minutes at 450 degrees Fahrenheit
I’m going to take the lid off I’m going to take it out of the oven and set it here so we could look at it might take a
little okay this is our half size loaf
it’s been going for 20 minutes that’s beautiful but look at that ugly spring I
mean that’s almost up to the top of a Dutch oven there’s tremendous oven spring very Airy light loaf and you can
see with that scoring that I did it had the exact desired effect that I wanted where it it allowed it to open up like
blossom at the top and open so we’ll get a nice tall loaf I’m going to put this back in the oven and we’ll set that for
another 20 minutes I’ll keep an eye on it because it is a smaller lower than the standard size so it may be done in
less than 20 minutes I’m just going to monitor it through the window of the
okay our small loaf has been in the oven now for 40 minutes it’s been 20 minutes with the lid on 20 minutes with the lid
off we’re gonna take that one check inside
so this looks nicely brown on top it’s a little bit light around the edges not
bad let’s check the internal temperature we’re looking for 212 degrees Fahrenheit or 100 Celsius
weird exactly to 12.2 so that inside dough is baked similar to the other one
it’s still a little bit light around the edges on this one I’m going to demonstrate something different I
carefully lift this out and I’m going to
set this on this pan I’m not going to use the Dutch oven directly on the rack
so I can see one that outside edges browning so we’ll put that in for other five or six ten minutes
okay the small loaf went another five minutes so exactly the same baking time
as the large loaf 25 minutes 20 minutes with the lid on 25 minutes with the lid
off and a little bit of charring right here on the tip where that ears stood up
but that’s a really nice looking loaf I love the size of this loaf so we just brush a little bit of our
excess flour off particularly off the
bottom yeah sounds holid what’s a good sign so
what do we observe here with this low swing got a little browner on top
it could be you know that Dutch oven has a little bit thinner walls sort of out a little bit more heat in through the top
oven could have been a couple of degrees higher because it was the second loaf that I baked that happens sometime but
this really opened up perfectly the way that I had preferred with that pinwheel
pattern of the scoring and allowed this loaf to really stand up and blossom
really beautifully so this is a half size loaf it uses half the flour of the
full size loaf that’s essentially used a
total of a thousand grams in the entire recipe so this is 500 grams this is 250
grams of flour and the other 250 is in the pizza dough that I set aside so I’m
really happy with this as well we’re going to let this cool and then we will slice both of these open and see what
they look like on the inside we have our two loaves our full size loaf right half
size loaf the half sized one is still cooling I’m going to set that aside the full size loaf is fully cooled now it’s
been cooling for almost two hours so it’s time to cut into this and see what it looks like inside
that’s the beautiful loaf that loaf came out perfectly so what I look for in the crumb which is
the inside is you want that even distribution of small holes and large holes this is the best lower I think
I’ve ever made in terms of how that looks really lovely very nice crumb that
means that our well fermentation worked by going an extra hour and a half we needed that so let’s give it a taste
mmm that’s really good
the crust is chewy the crumb is airy and
light really soft lovely and crumb the smell is it just smells wonderful and it
has a little tang to it actually a little more Tang than usual maybe that long fermentation we went a
couple of hours extra in the refrigerator this has a great sour sour
dough flavor
that’s the best local ever made right there so what made this successful
things that we did right one we picked a recipe and we stuck to it we used the Tartine bread recipe
followed this really religiously I consulted the book many times during the bake if I had tried to cobble together
some recipe made up of different components from one to three different recipes that doesn’t work I’ve tried
that before the second thing that we did was we did not do flour substitution we
talked about this the recipe called for 900 grams of white bread flour 100 grams
of wheat flour it’s exactly what we used the recipe is specifically tailored before those ingredients if we had
flipped it if I said oh I love whole wheat I’m going to do 900 grams of whole wheat 100 grams of bread flour this
would have been a brick this would have been a failure the recipes don’t work when you interchange or swap out
different types or amounts of flour or if we tried to replace the white bread
flour with white and corn flour for example it still would not have work because it has different protein content
different gluten content etc the third thing that we did was a Kerr measurement
of our ingredients so we used measurement by weight not volume if we
had tried to convert from grams to cups we demonstrated the amount of flour that
we would have put into the dough or if they need correct similarly with the salt if we had used tablespoons instead
of grams of salt we would have been under waited on the salt so this bread would not have come out as perfectly as
it did if we had used the conversion tables trying to get back to volume based measures of cups and tablespoons
which are unreliable when you’re baking bread you have to do it in grams we have to weigh the water or the the flour the
salt etc the third thing that we did was we measure temperature and time monitor
time throughout the process we probably took the internal temperature of the bread
that though the leaven and center are probably forty times over the last day and a half and if we hadn’t been
monitoring the temperature we would have totally under proof this because if I had just followed the recipe that said
we need to go three or four hours on bulk fermentation the stove wasn’t ready in three or four hours and I would not
have known that if we hadn’t been taking the internal temperature and realized that we got off to a slow start because the temperature was too cool so we
weren’t allowing the yeast to do its job early on and then the last tip our
typical mistake the beginners make is impatience and just this tendency to
want to rush through the process we hit a couple of roadblocks in the process so we had to spend two extra hours really
to get the leaven in shape before we could start the job as I mentioned the bulk fermentation wasn’t done in four
hours so we went five and a half hours on called fermentation so time is your
friend not your enemy when you’re making sourdough because you’re not in charge you’re not in control of all elements of
the process you have to let the yeast and the bacteria do their job and they need time and temperature to do that so
you have to have patience you can’t just force your way through the process because you’re not totally in control of
what’s happening with the predator that’s the reason for the successful bake I’m incredibly happy with it if you
follow those five tips I’m confident that you can make great bread why am i confident because I’m a beginner bread
maker and I just did it so I started baking bread baking sourdough bread about three months ago I
baked a few loaves that didn’t work out very well my wife got me the Tartine bread book for Christmas so I started
over again that was about six weeks ago and I keep records of all of my bread baking here so I can tell you how many
loaves I baked one two three four five
this is today this is the fifth wolf I’ve ever baked and this came out as
perfect as I could have so I’m a beginner I followed those five basic rules that’s why I wanted to share
this video with you and others so feel free to share it with your friends
relatives anybody who you think might benefit from learning from this video
and they thank you for sticking with it I know it was a long involved video but I wanted to share as much of my
knowledge as I could and help beginning bread bakers be successful as I have
been which is which is wonderful my name is Tom I’m coming to you from Cleveland Ohio and thank you again and yes I’ve
been wearing the same shirt for three days so I’m going to go change my shirt and eat some bread
you before we cut talk about bread knives
everybody who’s into bread baking should have a good bread moszer I think around $20 $25 on the Internet
I also recommend getting the protective cover or the sheath for it because then
I’ll keep your knife sharp and it makes a great sound when you take the knife out sorry that was my Quentin Tarantino

Tom Cucuzza
The Sourdough Journey Video Transcript: Tartine Bread Step-by-Step: Beginner Mistakes and Tips
Share:
Facebook
Twitter
Pinterest
Print
Email
On Key
Related Posts
Review: Sourdough Proofers and Temperature Control Devices (2025 Update)
What are the best sourdough temperature control devices?
2025 Gift Guide for Sourdough Bakers
Looking for gift ideas for a special sourdough baker? Check out my 2025 gift guide!
Sourdough Starter: Refrigeration Maintenance Methods
How can I maintain my sourdough starter in the refrigerator instead of at room temperature?
The ULTIMATE Sourdough Bulk Fermentation Guide
When is sourdough bulk fermentation finished?

Dough Temping for PERFECT Sourdough Fermentation
What is sourdough “dough temping,” and how does it work?